Blog

Easy Vegetable and Sausage Pancake Casserole

This post may contain affiliate links, please read our disclosure policy.

This Easy Breakfast recipe is prepped in about 5 minutes and on the table in about 20 minutes. Enjoy this Easy Vegetable and Sausage Pancake Casserole! While this post is sponsored, all opinions and the recipe are my own.

Easy Vegetable and Sausage Casserole

Easy Vegetable and Sausage Pancake Casserole

I love making breakfast.  I make it every Sunday for our family and a handful of the neighbors, Pancake Sunday is a holiday in our house 🙂  The kids always have their favorite variety of pancakes, and I try to mix it up every now and then for us adults.  But this past weekend, I wondered how I could add some vegetables into the pancakes and not have it be weird.  Turns out, it’s not weird at all, and absolutely delicious! I made an Easy Vegetable and Sausage Pancake Casserole and I will definitely be making it again.

It kinda reminds me of my Breakfast Strata, but this was WAY easier to make, lighter, and had a lot less carbs 🙂  In fact, I used the Buttermilk Protein Pancake mix, so it had added protein even!  Score!

Breakfast Casserole made with pancake mix

All you need to make this Vegetable and Sausage Pancake Casserole is 5 ingredients (veggies, sausage, water, pancake mix and cheese!) and about 25 minutes.  It takes about 20 minutes in the oven, and about 5 minutes of prep time.  I just love easy breakfast recipes that look (and taste) like you have been slaving in the kitchen since before the sun came up.

Now, here’s to make my Vegetable and Sausage Pancake Casserole, be sure to Print It and Pin It so that you can make it again and again.

Easy Vegetable and Sausage Pancake Casserole - Food Wine Sunshine
Print Recipe
4 from 2 votes

Easy Vegetable and Sausage Pancake Casserole

I love breakfast recipes that are easy to make and taste great. It makes mornings much easier! Enjoy this Easy Vegetable and Sausage Pancake Casserole recipe.
Prep Time5 minutes
Cook Time20 minutes
Total Time25 minutes
Course: Breakfast
Keyword: breakfast, easy recipe
Servings: 5
Calories: 367kcal
Author: Tracy

Equipment

  • Oven

Ingredients

  • 1 ½ cups pancake mix I used Krusteaz Protein Pancake Mix
  • 1 1¼ cup of veggies - I used 3/4 cup mushrooms & 1/2 cup diced tri-color peppers
  • 1 ½ cup water
  • 8 oz breakfast sausage half of a roll - I used hot
  • 4 oz shredded cheese - I used sharp cheddar

Instructions

  • Preheat oven to 400 degrees
  • Saute veggies in a medium pan until soft - add in a touch of oil or butter if needed
  • Add the breakfast sausage to the same pan and cook throughout
  • In a small bowl mix water and pancake until smooth
  • Pour the pancake mixture into an sprayed 8x8 baking dish
  • Sprinkle sausage and vegetable mixture on top of the pancake mix
  • Sprinkle shredded cheese on top
  • Bake 400 for 15-20 minutes or if you have a convection oven bake for 15-20 minutes at 350 degrees
  • Enjoy!

Nutrition

Calories: 367kcal | Carbohydrates: 23g | Protein: 18g | Fat: 23g | Saturated Fat: 10g | Cholesterol: 84mg | Sodium: 668mg | Potassium: 386mg | Fiber: 4g | Sugar: 1g | Vitamin A: 4518IU | Vitamin C: 9mg | Calcium: 274mg | Iron: 2mg

Vegetable and Sausage Pancake Casserole

I hope you enjoy this Vegetable and Sausage Pancake Casserole as much as we do! 

In fact, I think I will be making it again this coming Pancake Sunday, everyone loved it and it’s so easy to customize.  Breakfast is a staple in homes across the country and Krusteaz, makers of premium pancake and waffle mixes, has been making our Pancake Sunday a success for years.  They have just launched the new Buttermilk Protein Pancake mix this fall, and we have been loving it.  I love that it has 13g of added protein, so it’s the perfect way to keep our family full and energized all day long.

Tasty Vegetable and Sausage Breakfast Casserole

In keeping with Krusteaz’s commitment to simplified and wholesome ingredients, the new protein pancake is free of partially hydrogenated oils, high fructose corn syrup, artificial colors, flavors and preservatives.

Make sure to check Krusteaz out on Twitter, Facebook, Pinterest, and Instagram for more Breakfast Inspiration.

While you are at it, be sure to stay up to date with me too 🙂 Find Food Wine Sunshine on Facebook, Twitter, and Pinterest and be sure to check out all my delicious recipes.

Looking for more breakfast ideas?
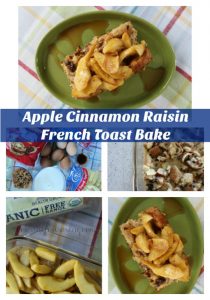
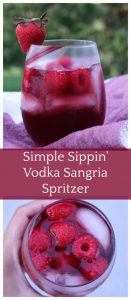
Apple Cinnamon Raisin French Toast Bake on Food Wine Sunshine and Cooking Green Chile and Egg Breakfast Casserole Recipe on Food Wine Sunshine Chocolate Coffee Cake Recipe on Food Wine Sunshine and Cooking

DIY Solar Eclipse Glasses – Easy To Make & NASA Approved!

This post may contain affiliate links, please read our disclosure policy.

The Solar Eclipse is coming, if you don’t have glasses to see it, see how you can easily make these NASA approved DIY Solar Eclipse Glasses. While this post is sponsored, all opinions are my own.

DIY Solar Eclipse Glasses

DIY Solar Eclipse Glasses

Easy To Make & NASA Approved

We made these so that we could watch the the Solar Eclipse on Monday, August 21st, 2017, but we still have them and will be using these DIY Solar Eclipse Glasses to check out the solar eclipse that’s coming up. While everyone would like to get a look at the Solar Eclipse, according to eye doctors, staring at the total eclipse of the sun without the proper eye protection can cause permanent damage to the eyes, even if someone stares for only a few seconds.

Did you get a pair of the Solar Eclipse glasses? I didn’t. In fact, by the time I realized that I needed fancy glasses to look at the Solar Eclipse, they were sold out just about everywhere. So, what do you do? You make a pair of Solar Eclipse Glasses.

Not only are these Solar Eclipse Glasses easy to make, but they are NASA approved!

Thinking that regular sunglasses are okay to catch of glimpse of the sun? NO! Please don’t do that, and please warn your children to not do it either. Regular sunglasses do not block out enough light to be used as eye protection during a solar eclipse.

NASA approved DIY Solar Eclipse Glasses

So, grab a cereal box, a white piece of paper (construction paper or computer paper is fine), and some aluminum foil and make your own Solar Eclipse Glasses.  This craft, as well as any potential solar eclipse viewing, should not be done by a child anyone, adult supervision is indeed required.

Now, here’s how to make your Solar Eclipse Pinhole Projector.

1) Empty the box of cereal and feel free to munch on the Fruity Pebbles while you begin DIYing.

NASA approved Solar Eclipse Glasses

2) Cut out a rectangle shape of white paper or cardboard that will fit snuggly inside the bottom of the box and tape into place.

How to make NASA approved Solar Eclipse Glasses

3) Cut a square shape on the left and right sides of the top of the box and tape up the center.

4) Cover one of the square holes with aluminum foil and tape into place.

How to make Solar Eclipse Glasses

5) Using a small nail or pencil, poke a small hole in the foil.

6) When the eclipse comes, look through the open square, with your back facing the sun. A small image of the sun will be projected through the foil and onto the white paper inside the box. Remember, never look directly at the sun!

Easy enough right?

Now, you and your family can still see the Solar Eclipse without having to worry about anything and you have some yummy cereal to snack on 😉

Key Information about Solar Eclipses:

  1. Types of Solar Eclipses:
    • Total Solar Eclipse: The Moon completely covers the Sun, leading to a brief period of darkness in the day.
    • Partial Solar Eclipse: The Moon partially covers the Sun, creating a crescent-shaped Sun.
    • Annular Solar Eclipse: The Moon appears smaller than the Sun, creating a “ring of fire” effect around the Moon during maximum eclipse.
  2. Solar Eclipse Viewing Safety:
    • Warning: Looking directly at the Sun during a solar eclipse can cause permanent eye damage or blindness.
    • Safe Viewing: Specialized solar filters or eclipse glasses are necessary for safe viewing. Telescopes or cameras also require solar filters to avoid damage.
  3. Frequency and Paths:
    • Solar eclipses occur roughly every six months but are visible only from specific areas on Earth during each event.
    • The path of totality (where a total solar eclipse is visible) varies for each eclipse, creating a “zone” across Earth where observers can witness the full eclipse.
  4. Cultural and Scientific Significance:
    • Solar eclipses hold cultural significance in many societies, often symbolizing themes of renewal, transformation, or cosmic events.
    • Scientifically, solar eclipses provide valuable opportunities for astronomers to study the Sun’s corona, solar flares, and other phenomena typically obscured by the Sun’s brightness.
  5. Upcoming Solar Eclipses:
    • Astronomical organizations and websites provide detailed information about upcoming solar eclipses, including dates, visibility maps, and safe viewing tips.
    • Eclipse enthusiasts often travel to locations within the path of totality to experience the awe-inspiring beauty of a total solar eclipse.
DIY Solar Eclipse Glasses - Easy To Make & NASA Approved! - Food Wine Sunshine
Print Recipe
5 from 3 votes

DIY Solar Eclipse Glasses – Easy To Make & NASA Approved!

The Solar Eclipse is on Monday, August 21st. Don’t have the fancy glasses to look at it? Make these NASA approved DIY Solar Eclipse Glasses.
Prep Time5 minutes
Total Time5 minutes
Course: Fruity Pebbles Eclipse Pinhole Projector
Author: Fruity Pebbles

Ingredients

  • Cereal Box – I used Fruity Pebbles
  • White Paper printer or construction paper is fine
  • Tape
  • Scissors
  • Aluminum Foil

Instructions

  • Empty the box of cereal and feel free to munch on the Fruity Pebbles while you begin DIYing.
  • Cut out a rectangle shape of white paper or cardboard that will fit snuggly inside the bottom of the box and tape into place.
  • Cut a square shape on the left and right sides of the top of the box and tape up the center.
  • Cover one of the square holes with aluminum foil and tape into place.
  • Using a small nail or pencil, poke a small hole in the foil.
  • When the eclipse comes, look through the open square, with your back facing the sun. A small image of the sun will be projected through the foil and onto the white paper inside the box. Remember, never look directly at the sun!
  • Enjoy this once in a lifetime opportunity!

Will you be trying to catch a glimpse of the Solar Eclipse?

*Remember, during the eclipse, turn you back to the sun and look through the opening on the right side of the cereal box. The reflection of the eclipse will play out on the paper inside the box.

Easy DIY Solar Eclipse Glasses

Have fun making your own Cereal Box Solar Eclipse Glasses!

Be sure to check out Food Wine Sunshine on Facebook, Twitter, Pinterest, and Instagram for more helpful tips, DIY, recipes, and more.

Crunchy Peanut Butter & Fruit Wraps

This post may contain affiliate links, please read our disclosure policy.

These Crunchy Peanut Butter and Fruit Wraps are an easy and nutritious lunch idea for the kids and YOU! Ready in just moments, your whole family will love these Crunchy Peanut Butter & Fruit Wraps. While this post is sponsored, all opinions are 100% my own.

Crunchy Peanut Butter & Fruit Wraps

Crunchy Peanut Butter & Fruit Wraps

It’s Back to School time, and if you are like me, you are already looking for ways to spruce up lunch for the kids.  We have been doing this (making lunches) for years, and while the kids don’t complain about the daily Peanut Butter sandwich, they sure get excited when it’s something different.  But, I’ll be honest, I not only lack creativity in the morning, but time.  So, I need lunchbox ideas for my kids that are not only delicious and healthy, but also easy to make.

Peanut Butter and Fruit Wraps

And that’s exactly why I love this Crunchy Peanut Butter and Fruit Wrap recipe.  These yummy roll ups are ready in about 60 seconds and I can easily switch them up depending on the kids’ likes.

Peanut Butter and Fruit Sandwiches

I use freeze-dried fruit in my wraps so that I don’t have to worry about fresh cut fruit drying out or browning.  Th last thing I want to hear from my kids is “The fruit you gave me was gross!”  Plus, freeze-dried fruit gives them that extra crunch.  I love using Crispy Green Crispy Fruit because it is 100% pure fruit…nothing else.  Crispy Green makes several varieties of freeze-died fruit – from cantaloupe to pineapple, so there are lots of ways for me to mix-up these Crunchy Peanut Butter & Fruit Wraps for the kids.  Apple and banana are always a hit, as they are a natural match for peanut butter, but my favorite is actually the Asian pear.  Yes, I said my favorite….the kids aren’t the only ones that need healthy and delicious lunches 😉

Healthy snack ideas

Now, here’s how to make my Crunchy Peanut Butter & Fruit Wrap recipe, be sure to Print It and Pin It so that you can make it again and again.

Crunchy Peanut Butter & Fruit Wraps - Food Wine Sunshine
Print Recipe
5 from 5 votes

Crunchy Peanut Butter & Fruit Wraps

These Crunchy Peanut Butter & Fruit Wraps are easy to make for kids lunches or a nutritious snack on the go!
Prep Time2 minutes
Total Time2 minutes
Course: Lunch/Snack
Keyword: easy recipe, healthy, lunch, peanut butter, snacks
Author: Tracy

Ingredients

  • Tortillas - I used flour
  • Peanut butter or substitute of your choice
  • Granola
  • Crispy Green Freeze-Dried Fruit - I used Asian Pear

Instructions

  • Spread the peanut butter on the tortilla
  • Sprinkle on granola and freeze-dried fruit
  • Roll up the tortilla
  • Enjoy!

Healthy snack ideas for kids

I hope you enjoy these Crunchy Peanut Butter and Fruit Wraps as much as we do!

Another reason to love Crispy Green is that they are one of the sponsors for the Produce For Kids Power Your Lunchbox campaign.

Healthy lunch ideas for kids

Produce for Kids is encouraging us to kick off the school year right by pledging to eat a healthier lunch now.

For every online pledge, lunchbox-friendly companies supporting Power Your Lunchbox Pledge will make a collective $1 donation to Feeding America® children’s programs such as Kids Café, Backpack program and Child Hunger Corps.  Produce for Kids partners supporting Power Your Lunchbox Pledge 2017 include: Avocados from Mexico, Bee Sweet Citrus, Crispy Green®, Eat Smart, Earthbound Farm®, Eric Carle®, NatureFresh™, Pero Family Farms, Sun World®, Vegy Vida® and Zespri®.  So, keep a look out for them in store!


Fruit and Peanut Butter Wraps

How can YOU help?

  • Take the pledge. Pledge to pack a healthier lunchbox at PowerYourLunchbox.com. Companies supporting the program will make a collective $1 donation for every pledge taken to Feeding America programs that support families and children.
  • Take the pledge as a classroom. Elementary and preschool classrooms who take the pledge can pledge on behalf of all the students in their class, and access fun free classroom resources.
  • Show off healthy lunchboxes on social media. Produce for Kids’ Instagram and Twitter followers can use the #PowerYourLunchbox hashtag to show off their healthy lunchboxes to have their lunchboxes featured on the Produce for Kids Facebook page.

Healthy lunches for kids

Be sure to check out ProduceForKids.com for more than 250 registered dietitian-approved and family-tested recipes, meal planning tools, grocery store specific campaign details, and healthy tips from real parents and on Facebook and Pinterest for even more!

Tasty Crunchy Peanut Butter & Fruit Wraps

While you are at it, be sure to follow Food Wine Sunshine on Facebook, Twitter, Pinterest and Instagram for more tips, fabulous recipes and more!

Sausage Hash Brown Breakfast Casserole

This post may contain affiliate links, please read our disclosure policy.

Looking for an easy breakfast recipe that requires very little prep time? This Sausage Hash Brown Breakfast Casserole is it. Enjoy it with your family today!  While this post is sponsored, all opinions and the recipe are my own.

Sausage and Hash Brown Breakfast Casserole

Sausage Hash Brown Breakfast Casserole

I love making breakfast on the weekend, since I usually make it for my family as well as my neighbors on Sunday, I love creating easy breakfast recipes that are also full of flavor.  This week I combined all of our favorite things, tossed it in a casserole pan and the result was this hearty and delicious Sausage Hash Brown Breakfast Casserole.

I used hot turkey sausage in my recipe, but you can easily submit any type of sausage that you prefer.  I also used the refrigerated hash browns instead of the frozen, if you opt for frozen hash browns, I recommend thawing them first.  Meat, potatoes, cheese and eggs…what more could a breakfast ask for?!

Easy Sausage Hash Brown Breakfast Casserole

Now, here is my Sausage Hashbrown Breakfast Casserole recipe, be sure to Print It and Pin It so that you can make it again and again.

Sausage and Hash Brown Breakfast Casserole
Print Recipe
5 from 4 votes

Sausage Hash Brown Breakfast Casserole

Add all of your favorite things about breakfast into one casserole dish and you will get this Sausage Hash Brown Breakfast Casserole. Grab the easy recipe!
Prep Time10 minutes
Cook Time1 hour 15 minutes
Total Time1 hour 25 minutes
Course: Breakfast
Servings: 6 - 8
Author: Tracy

Ingredients

  • 1 bag of fresh hash browns - if used frozen - thaw them - I used the O'Brien variety for a bit of extra flavor
  • 8 oz shredded cheese - I shredded Cabot Seriously Sharp Cheddar
  • 6 eggs - I used Nellie's Free Range eggs
  • 1/2 cup milk - I used skim
  • 1 tablespoon of your favorite table seasoning - I used Dust by Voodoo Chef
  • 1 package of turkey breakfast sausage

Instructions

  • Preheat oven to 350 degrees
  • Cook the sausage in a pan until sausage is no longer pink, crumble into small pieces
  • Spray an 8x8 baking dish
  • Pour the hash browns into the baking dish
  • In a small bowl mix the eggs, milk, and seasoning
  • Pour the egg mixture on top of the hash browns
  • Sprinkle on 1/2 the cheese
  • Layer on the sausage over the cheese
  • Sprinkle on the remainder of cheese
  • Cover and bake for 1 hour
  • Remove cover - bake for another 10 minutes
  • Allow to set for 5 minutes before serving
  • Enjoy!


I hope you and your family enjoy this Hash Brown and Sausage Breakfast Casserole as much as we do!

Tasty Sausage and Hash Brown Casserole

I used Nellie’s Free Range eggs and Cabot Creamery cheese in this recipe for one very important reason, they’re the best.  I have had the opportunity to partner with both brands in the past and I am a loyal customer.  The quality of the ingredients does make a difference in the end result of your recipe.

Best Sausage and Hash Brown Casserole

What is one of your family’s favorite breakfast casserole recipes?

Nellie’s Certified Humane Eggs store locator

Cabot Products store locator

Be sure to check out all the recipes on Food Wine Sunshine and follow me on Facebook, Twitter, Pinterest and Instagram.

Looking for more breakfast deliciousness?

Egg, Biscuits and Gravy Overnight Bake - Hearty Breakfast Casserole Recipe on Food Wine Sunshine Breakfast Biscuit Cups Recipe

Healthy Breakfast Cereal Cookies

This post may contain affiliate links, please read our disclosure policy.

These breakfast cereal cookies will make your mornings brighter…and easier! These healthy breakfast cookies are easy-to-make and the whole family is sure to love them. While this post is sponsored, all opinions and the recipe are my own.

Healthy Breakfast Cereal Cookies

Healthy Breakfast Cereal Cookies

Breakfast is the most important meal of the day, do you treat it that way?  For you and your kids?  I know what my mornings look like, and I would guess that yours look about the same.  Getting ready for work, getting the kids ready for school, making lunches, and making sure everyone is out the door breakfast is pretty easy to overlook.

But today, I have the perfect solution for you.  You can make your mornings biggerer and better with these Breakfast Cereal Cookies.  They are made with the cereal classic, Post Honeycomb, Honeycomb combines sweetened corn and big honey flavor, making it the perfect cereal for these Breakfast Cereal Cookies.

Easy Breakfast Cereal Cookies

Each spoonful of classic Honeycomb cereal is bursting with honey flavor giving these “biggerer” Breakfast Cereal Cookies the right amount of flavor to keep everyone in the family coming back for more.

Not to mention, who can resist the Honeycomb’s one-of-a-kind big shape?!  The unique hexagonal shapes brighten up any breakfast or after school snack.

Tasty Breakfast Cereal Cookies

What I love about this Biggerer Breakfast Cereal Cookies recipe is that they are very easy to prep, and in less than 30 minutes you will have about 18 – 24 Biggerer Breakfast Cereal Cookies.  You can even double the recipe to keep mornings going smooth even longer!  I actually had the kids help make these, as I mentioned they are very easy to prep, and the kids had a blast “crunching” the Post Honeycomb Cereal.  We just put the Post Honeycomb Cereal in a ziplock bag and let them use a rolling pin.  I didn’t want to put them in the food processor just in case the pieces got too small, I didn’t want cereal dust.

You can also use a mixer to mix the ingredients, but I didn’t feel like getting mine out, so I just did it by hand 🙂

Best Breakfast Cereal Cookies

I did use applesauce to cut down on the amount of sugar in this recipe, but the big honey flavor from the Honeycomb cereal gives you the perfect amount of sweetness, without all the extra calories.

Now, here is my Biggerer Breakfast Cereal Cookie Recipe, be sure to Print It and Pin It so that you can make it again and again.  Once you make one batch, you will definitely want to make another!

Breakfast Cereal Cookies
Print Recipe
4.59 from 31 votes

Biggerer Breakfast Cereal Cookies

Make your mornings a breeze with these easy-to-make Breakfast Cereal Cookies. Packed with flavor and nutrition, the whole family will love them!
Prep Time10 minutes
Cook Time18 minutes
Total Time28 minutes
Course: Breakfast/Snack
Servings: 18 - 24 cookies
Author: Tracy @ havingfunsaving.com

Ingredients

  • 1 1/2 cups crunched Post Honeycomb Cereal
  • 1/2 stick butter - softened not completely melted
  • 1/8 cup 4 tablespoons white sugar
  • 1/8 cup 4 tablespoons brown sugar
  • 1 egg
  • 3/4 cup flour
  • 2 teaspoons of vanilla extract
  • 1/2 cup applesauce
  • 1 teaspoon cinnamon
  • 1/2 teaspoon baking soda
  • 1/2 teaspoon salt
  • 1/2 cup rolled oats
  • 3/4 cup dried cherries
  • 2 tablespoons mini chocolate chips

Instructions

  • Preheat oven to 350 degrees.
  • In a large bowl, cream together the butter, sugar and eggs until smooth.
  • Add in the flour, vanilla extract, applesauce, cinnamon, baking soda and salt to the bowl. Mix well.
  • Add in the crunched Post Honeycomb cereal, dried cherries, chocolate chips and rolled oats. Mix well.
  • Drop big rounded tablespoons of cookie dough on a sprayed cookie sheet 2 inches apart.
  • Gently press one Honeycomb into the top of the dough.
  • Bake for 15 - 18 minutes until golden brown.
  • Cool.
  • Enjoy!

Notes

Fill free to switch up your mix-ins! Pick your favorite dried fruit, sprinkle in some chia seeds, enjoy!


I hope you enjoy these Biggerer Breakfast Cereal Cookies as much as we do!

Delicious Breakfast Cereal Cookies

It’s time to take mornings back again, make breakfast biggerer and better thanks to Post Honeycomb.  Whether you have Post Honeycomb in these breakfast cereal cookies or with milk, you’re family and you’re mornings will be sweeter, each spoonful of classic Honeycomb cereal is bursting with honey flavor for a “biggerer” breakfast option.

Healthy homemade Cereal Cookies

These breakfast cereal cookies aren’t just for breakfast, they make for a delicious afternoon school snack too!

Breakfast Cereal Cookies recipe

For more tips on biggerer breakfasts, visit Post Honeycomb online, on Facebook and follow the #Honeycomb hashtag on Twitter and Instagram.

Be sure to follow Food Wine Sunshine on Facebook, Twitter, Pinterest, Google + and Instagram for more tips, fabulous recipes and more!

Premier Protein Shakes at Costco + Tropical Sunrise Smoothie Recipe

This post may contain affiliate links, please read our disclosure policy.

Premier Protein Shakes taste great and are a healthy, low fat, low sugar protein packed way to start your day or to recover for your workout.  Premier Protein Shakes are a great addition to your healthy lifestyle. While this post is sponsored, my love for saving money and Premier Protein Shakes are my own.

Premier Protein Shakes at Costco

Premier Protein Shakes at Costco

+

Tropical Sunrise Smoothie Recipe

Looking for an easy way to add a bit of protein and nutrition in your diet? Want a protein shake without a blender, one that is easily portable, and tastes great? Meet Premier Protein Shakes.

Premier Protein’s shakes are packed with 30g of healthy protein for only 160 calories and 1g of sugar, and are a healthy snack option for sustained energy when you need it most. You can drink them right out of the carton for easy-on-the-go protein-boost, over ice for an afternoon pick-me-up healthy snack, or blended with ice for a nutritious smoothie. Any way your pour your Premier Protein Shake, your body will thank you for it!

Chocolate Premier Protein Shakes at Costco

You will find Premier Protein Shakes is available at Costco nationwide.

You get great tasting nutrition AND you save money, you can’t go wrong! Be on the look out for all three flavors: Chocolate, Vanilla, and Bananas & Cream. All three varieties have 30 grams of healthy protein and low in fat. While they are on sale, maybe you should try all three! My favorite at the moment is chocolate, because it also satisfies my sweet tooth, but Bananas & Cream is a close runner-up 🙂

Tropical Sunrise Smoothie

Speaking of Bananas & Cream, you have got to try this smoothie recipe! You all know how I start every day with a smoothie, and this Tropical Sunrise Smoothie looks amazing!

Tropical Sunrise Smoothie

Start your day with this deliciously easy Tropical Sunrise Berry Smoothie. Made with only a few ingredients and packed with protein, you'll love this low fat smoothie.
Prep Time5 minutes
Total Time5 minutes
Course: Smoothie
Author: FitFluential

Ingredients

INGREDIENTS OF MANGO SMOOTHIE:

  • 1/2 cup Premier Protein Bananas & Cream shake
  • 2 frozen bananas
  • 1 cup frozen mango
  • 1 sliced orange

INGREDIENTS OF BERRY SMOOTHIE:

  • 1/2 cup Premier Protein Bananas & Cream shake
  • 2 cups frozen mixed berries strawberries, blackberries, blueberries, cherries
  • 1 frozen banana

Instructions

  • Place all mango smoothie ingredients into blender.
  • Blend until smooth and pour into glass.
  • Rinse blender container.
  • Place berry ingredients into blender and blend until smooth.
  • Pour berry layer on top of mango smoothie.
  • Enjoy!

Premier Protein Shakes Deals at Costco

Find a Costco near you

Make sure to stay social with Premier Protein too! Follow on Facebook, Twitter, Pinterest and Instagram! Costco Ad is one of the warehouse membership sales and you can find many more deals like this in it.

Be sure to check out all the delicious Smoothie recipes on Food Wine Sunshine and follow me on Facebook, Twitter, Pinterest, and Instagram.

This is a sponsored conversation written by me on behalf of Premier Protein . The opinions and text are all mine.

What Are Wine Sulfites?

This post may contain affiliate links, please read our disclosure policy.

What exactly are sulfites? Sulfites are a food preservative commonly used in winemaking. Sulfites aid in maintaining the flavor and freshness of wine. Learn more about wine sulfites.

What you need to know about wine sulfites

What Exactly Are Sulfites and Why Are They In Wine?

I’m sure you have seen the notice on wine bottles, or maybe you have just heard the term. So, if you are slightly curious as to what wine sulfites are, I have some answers for you. All wines contain them, but are sulfites really bad for you? You’ve probably seen the scary warning label on wine bottles: “Contains Sulfites.” But just what does that exactly mean and should you be concerned?

The Role of Sulfur in Winemaking

Sulfur, usually in the form of Sulfur Dioxide (SO2), acts as a preservative that retards microbial activity in wine. It occurs naturally in grapes and is present in tiny amounts in all wine. Its presence in wine was noted as far back as the 15th century. Today it is expressed in parts per million (PPM). U.S. laws allow a maximum sulfur content in wine of 350 PPM but wine rarely exceeds 150 PPM in actual practice and most well-made wines are usually in the 30-50 PPM range.

The human body naturally produces around 1,000 milligrams of sulfur dioxide every day. A typical glass of wine contains about 80 mg. According to Michael Lasky, writing for Wine Business Monthly, despite widespread belief, there has been no study that links low levels of sulfites to deleterious health issues. However, very high levels (much more than would be found in any wine) are believed to affect certain asthmatics.

Does wine need Sulfites

Can You Smell or Taste Sulfur in Wine?

Wine naturally contains less than 10 PPM (parts per million), not enough to protect against spoilage. So it must be added in the form of powder, solution or gas. Most wineries add SO2 at the crush and again after fermentation. Under ideal conditions the sulfur bonds with the color pigments in wine and becomes odorless and tasteless. Excess molecules of sulfur remain free from bonding and are easily detected upon opening a bottle of wine. SO2 is very volatile and usually dissipates within a few seconds of exposure to air. But when a wine has been excessively sulfured you can detect an unpleasant warm, earthy aroma and flavor. SO2 levels up to 10 PPM are generally undetectable.

Why are there sulfites in wine

Is there Sulfur in Organic Wine?

The amount of truly organic wine produced in the U.S. and Canada is minuscule. Wines so labelled must contain no more than 10 ppm SO2 and no sulfites may be added. More often you will see wines labelled “Made with Organic Grapes.” U.S. law allows up to 100 PPM in wines so labelled. There are no federal standards for wines labelled “biodynamic,” but Demeter International (the agency that certifies biodynamic farming) restricts added sulfites to 150 ppm.

Wineries Are Trying To Reduce the Need for Added Sulfites

It has been established that certain options can be used to reduce the amount of added sulfites in wine. Most important is temperature control. Microbial activity exists in direct proportion to temperature and very little activity is found in wine held below 52°. But once the wine reaches your home, the bugs will begin their destructive work if the wine is not held at very cool temperatures. Such wines should not be cellared at temperatures above 55° for more than two or three years, especially in the case of white wines. Higher alcohol levels inhibit microbial activity and reduce the need for added sulfites, but can degrade the quality of the wine if excessive. Higher acid also acts as a preservative. And the increasingly common practice of aging wine on the lees (spent yeast cells after fermentation, “sur lie”) allows the yeast cells to function as antioxidants, reducing the need for additional sulfites.

Since any chemical additives will degrade the quality and freshness of wine, wineries are striving to lower the level of added sulfites by adopting some of the procedures listed above. One Napa Valley winery, Coppola’s Rubicon Estate (Inglenook), has already reduced its use of added sulfites by 40% and other wineries are following suit.

How to sulfites affect wine

Lessons Learned About Wine Sulfites

  1. There’s little need to worry about sulfites in your wine since your own body produces them in much greater quantity.
  2. Truly organic wines should be consumed within one to three years.
  3. All wine kept for extended time should be stored as close to 55° as possible.
  4. If your wine smells or tastes of sulfur after a minute or two of aeration it has been heavily sulfured and the wine’s inherent quality has been degraded to some degree.

What Are Wine Sulfites

Did you know that wine had sulfites? What are your thoughts on wine sulfites?

Be sure to follow Food Wine Sunshine on Facebook, Twitter, Pinterest, and Instagram for more wine tips and experiences, healthy recipes, and travel.

3 Ingredient 3 Minute Fudge

This post may contain affiliate links, please read our disclosure policy.

This 3 Ingredient 3 Minute Fudge recipe couldn’t be much easier. Grab the easy recipe and indulge your sweet tooth with this easy Fudge recipe with just 3 ingredients.

Easy Homemade Fudge

3 Ingredient 3 Minute Fudge

I have a sweet tooth. I will admit it. I go to the gym 4 – 5 times a week, I start my day with a healthy smoothie, and I pride myself in making healthy meals for dinner for my family. But sometimes, I just need a bit of sweet. Just a bit of something that melts in your mouth and satisfies that ever-persistent sweet tooth. And this 3 minute 3 ingredient fudge is perfect. You really only need 2 ingredients, but I added in some juicy dried cherries into my three minute fudge recipe, I love chocolate covered cherries and I just so happened to have dried cherries in my pantry, so it seemed like a natural add-in.

You can add just about anything into your 3 Ingredient 3 Minute Chocolate Fudge, the sky is the limit! Or your pantry 😉

Think:

  • Cookie crumbles
  • Dried fruit
  • Peanut Butter
  • Nuts
  • Leftover Halloween candy – or any candy!

3 Minute Fudge

You can also use white chocolate chips, dark chocolate chips or milk chocolate chips…or a combination of two of the three.

Seriously, did you know that fudge could be so easy to make? Now, grab a microwavable bowl, a can of sweetened condensed milk, a bag of chocolate chips and your favorite mix-in. Let’s take care of that sweet tooth!

Here is my Chocolate Cherry 3 Minute 3 Ingredient chocolate bite of heaven. Be sure to Print It and Pin It so that you can make it again and again. Or tomorrow 🙂

3 Minute Fudge
Print Recipe
5 from 2 votes

3 Ingredient 3 Minute Fudge

If you have a few simple ingredients and about 3 minutes, you can have a sweet bite of heaven! Grab this 3 Minute Chocolate Fudge Recipe and enjoy.
Prep Time1 minute
Cook Time2 minutes
Total Time3 minutes
Course: Dessert
Keyword: chocolate, dessert, dessert recipe, easy recipe, fudge
Calories: 1274kcal
Author: Tracy

Equipment

  • Microwave

Ingredients

  • 14 oz sweetened condensed milk 1 can
  • 12 oz chocolate chips - white/milk/dark chocolate
  • 3/4 cup dried cherries - optional

Instructions

  • Put the condensed milk and chocolate chips into in a medium microwaveable bowl
  • Microwave for 1.5 - 2 minutes
  • Stir until blended well
  • Gently stir in dried cherries - or any other mix-in that you would like
  • Pour the chocolate mixture in a parchment paper/wax paper lined 8 x 8 or 6 x 9 baking pan
  • Place in refrigerator for 1 - 2 hours until hardened
  • Cut into bite size pieces
  • Enjoy!

Notes

Feel free to substitute the dried cherries with whatever mix-in you would like. Think, cookie crumbles, dried fruit, peanut butter, nuts, etc. The sky is the limit! Or your pantry...
The Nutrition Facts is for the WHOLE recipe (not including the dried cherries), it all depends on how big you make your fudge pieces on the individual Nutrition Facts.

Nutrition

Calories: 1274kcal | Carbohydrates: 216g | Protein: 31g | Fat: 35g | Saturated Fat: 22g | Cholesterol: 135mg | Sodium: 504mg | Potassium: 1472mg | Sugar: 216g | Vitamin A: 1060IU | Vitamin C: 10mg | Calcium: 1127mg | Iron: 1mg

Easy Fudge Recipe

I hope you enjoy this easy Three Minute Fudge recipe as much as we do!

Should you store your 3 minute fudge in the refrigerator?

You can.  Your homemade fudge will last longer if you do.  If you store your fudge in the refrigerator it will be good for 3 – 4 weeks.  However, in my house it’s eaten long before that.

How long will homemade fudge last if not stored in the refrigerator?

If you don’t sore your 3 minute fudge in the refrigerator it will last for about a week.  Again, in my house it’s gone in a few days 😉

Does it really only take 3 minutes to make homemade fudge?

Yes!  It’s incredibly easy!

Be sure to check out my Rocky Road 3 minute fudge recipe as well.  It’s my daughter’s favorite.

3 Minute Fudge Recipe

Have you ever made homemade fudge using sweetened condensed milk before?  What is your favorite kind of fudge?

Be sure to follow Food Wine Sunshine on Facebook, Twitter, Pinterest and Instagram for more tips, fabulous recipes and more!

How To Bake Bacon to Crispy Perfection

This post may contain affiliate links, please read our disclosure policy.

Any way you cook it, bacon is amazing. But baking bacon is easier and less messy that cooking it on your cooktop. Check out how to bake bacon and never look back.

Crispy Baked Bacon

How To Bake Bacon to Crispy Perfection

Bacon.  Is there anyone that doesn’t love bacon?  Crispy awesomeness.  Bacon is perfect just about anytime of the day – with breakfast, lunch, dinner and even dessert!  But do you love cooking it?  No matter if it’s on a skillet or on a griddle, we manage to get grease splatters all over the cooktop and kitchen counter.  And if I am cooking it on Sunday, when we have friends and neighbors over for Pancake Sunday, I have to wake up early to make sure I can get it all done in time.

Then this past weekend my son unplugged the deep freezer in the garage and forgot to plug it back in, so when we realized it, I had a lot of bacon that was now just about thawed.  Since there was no way I was wasting it, I needed a way to cook all that bacon all at once.  I turned on the oven, grabbed a few cookie sheets and baking racks and started baking some serious bacon.  And cleaning out my deep freezer.

I used the baking racks, because I didn’t want the bacon sitting in the grease and I figured it would get crispier this way.  I was right.  After about 25 minutes, I had crispy amazing BACON.

Delicious baked bacon

My husband and I decided that baking bacon was definitely our new favorite way to cook bacon, I mean it takes less effort, the bacon isn’t sitting in the grease, there are no grease splatters all over the place and it cooks up perfectly.  And trust me, we are pretty particular when it comes to bacon-crispiness and this passed the test.

So, how do you bake bacon?  Here ya go!

Zucchini and Sausage Breakfast Casserole
Print Recipe
5 from 2 votes

How To Bake Bacon

Everyone loves bacon, but did you know how to bake bacon in the oven? Baking bacon is less messy and still cooks up to crispy-bacony-awesomeness.
Cook Time25 minutes
Total Time25 minutes
Course: BACON
Author: Tracy @ havingfunsaving.com

Ingredients

  • BACON

Instructions

  • Preheat the oven to 400 degrees
  • Place the baking rack on the cookie/baking sheets
  • Place the bacon on the racks
  • Put the bacon into the oven for 20 - 25 minutes until bacon has reached desired crispiness
  • Allow to cool
  • Enjoy!

Notes

Bacon will continue to "cook" once you take it out of the oven for a few minutes.
Depending on the thickness of your bacon, you may be able to reduce the time, be sure to check your bacon starting at the 15 minute mark.


I hope you enjoy baked bacon as much as we do!  But, it’s bacon…so of course you will!

How To Bake Bacon To Crispy Perfection | Any way you cook it, bacon is amazing. But baking bacon is easier and less messy that cooking it on your cooktop. Check out how to bake bacon and never look back. Read more breakfast recipes, sweet treats and easy recipes on foodwinesunshine.com

Did you know how to bake bacon? What’s your favorite way to eat bacon?

Be sure to check out all the recipes on Food Wine Sunshine and follow me on Facebook, Twitter, Pinterest, Google + and Instagram.

Looking for more deliciousness?

Zucchini and Sausage Breakfast Casserole Recipe on Food Wine Sunshine Egg, Biscuits and Gravy Overnight Bake - Hearty Breakfast Casserole Recipe on Food Wine Sunshine Breakfast Biscuit Cups Recipe Eggs in a Mug Recipe on Food Wine Sunshine and Cooking

Winey Moscow Mule Cocktail

This post may contain affiliate links, please read our disclosure policy.

Calling all wine lovers!  Grab this Winey Moscow Mule Cocktail recipe, sit back, relax and enjoy!  This wine cocktail is a fun twist on the traditional Moscow Mule.

Winey Moscow Mule Cocktail

Winey Moscow Mule Cocktail

If you like a good Moscow Mule, then you’ll love this wine cocktail recipe.  The Winey Moscow Mule Cocktail is light, refreshing, and a delicious spin on the traditional Moscow Mule.

To make the Winey Moscow Mule, you just need Ginger Beer, Vodka, Lime, Ice and of course…wine.  Chardonnay works perfectly in this cocktail recipe as it’s a bit dry and not as sweet as other white wines.  Serve it up in the traditional cooper mug or any fun glass.  I have shared a few wine cocktail recipes, but this is the first with white wine, and I have to say, I will definitely be making it again.  In fact, I already have several times.

Moscow Mule with wine

Like I mentioned, the Winey Moscow Mule is light and easy to drink, but don’t be fooled, it will catch up with you!  It does have vodka and wine in it remember 😉

Moscow Mule Wine Cocktail

If you are ready to make this wine and vodka cocktail and find yourself missing an ingredient, don’t worry!  You can get wine and vodka delivered to your door, whaaaat?  Yep!  But if you don’t want to do that, you can try substituting the Chardonnay with another white wine, Sauvignon Blanc is a bit citrusy, but Pinot Grigio may work.  Pinot Grigio is a bit “lighter” than Chardonnay, but the Ginger Beer may pair nicely.  I used CK Mondavi and Family Chardonnay because it’s a great wine at a great price point, it’s only about $7.99 per bottle, so it’s great for mixing my wine cocktails.

Ginger Beer is a must for any moscow mule that you are mixing up, personally I like Gossling’s Ginger Beer but if you have a favorite, go ahead and use that one.

Now, here is my Winey Moscow Mule Cocktail Recipe, be sure to Print It and Pin It so that you can make it again and again.

Winey Moscow Mule Cocktail

Add your favorite Chardonnay into the traditional Moscow Mule and you have the Winey Moscow Mule Cocktail. Light and refreshing, this drink is a must try.
Prep Time2 minutes
Total Time2 minutes
Course: Cocktail
Keyword: cocktails, moscow mule, vodka, wine, wine cocktail
Servings: 1
Author: Tracy

Ingredients

  • 4 oz. Ginger Beer
  • 3 oz. Chardonnay - I used CK Mondavi and Family
  • 1 oz. Vodka
  • Ice
  • Juice from one lime wedge
  • Slice of lime for garnish if desired

Instructions

  • Fill your favorite cooper mug or glass with ice
  • Pour in the ginger beer, wine, and vodka
  • Squeeze in the lime juice
  • Stir lightly
  • Garnish with slice of lime if desired
  • Sip and enjoy!


Delicious Winey Moscow Mule

I hope you and your friends enjoy The Winey Moscow Mule as much as I do!

Refreshing Winey Moscow Mule Cocktail

Try these 3 refreshing cocktail recipes the next time you are celebrating happy hour!


Need new glasses for those cocktails?

What is one of your favorite wine cocktail recipes?

Be sure to check out all the recipes on Food Wine Sunshine and follow me on Facebook, Twitter, Pinterest, and Instagram.

Looking for more wine cocktail recipes?


Simple Sippin' Vodka Sangria Spritzer - Food Wine Sunshine  Call Me A Cab Vodka Lemonade Wine Cocktail - Food Wine Sunshine  Aloha Sunset Wine Cocktail on Food Wine Sunshine Summer Citrus Wine Cocktail - Food Wine Sunshine

Follow Me!