Blog

Curtis Stone’s Bacon and Green Onion Stuffing

This post may contain affiliate links, please read our disclosure policy.

If you are looking for an amazing stuffing recipe, then look no further than this recipe from Chef Curtis Stone! We love this Curtis Stone’s Bacon and Green Onion Stuffing Recipe and I know you will as well.

Curtis Stone's Bacon and Green Onion Stuffing

Curtis Stone’s Bacon and Green Onion Stuffing Recipe

The holidays are here and I’m sure you have been thinking about your holiday menus. Do you make the same things every year or do you like to switch it up? Do you like your menu traditional, or do you switch it up a bit every year? We also make turkey with stuffing or Thanksgiving, then again on New Years and then we will do a completely non-traditional day, like March 4th or something and have another “Thanksgiving” feast with all our neighbors. Turkeys are so inexpensive over the holidays, like for Thanksgiving, I got my turkey for only $6 at Winn-Dixie, so why not grab more than one?!

Curtis Stone grocery shopping

I had the unforgettable opportunity to do my Thanksgiving Feast shopping with Chef Curtis Stone at Winn-Dixie in Hyde Park!  We got all the fixing for several of his Thanksgiving Feast recipes and my family an I were very excited to try something new with our Thanksgiving Day menu.

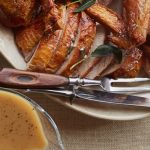
We made Roasted Turkey with Sage-Brown Gravy with Bacon and Green Onion Stuffing. My husband and I make a mean stuffing, we put everything in it from apples to jalapenos, so I was curious how this simplified version would be. But, let’s be honest, it is Chef Curtis Stone’s recipe, so it was bound to be amazing.

Winn Dixie Hyde Park

So, we grabbed our coffees and got to shopping!

Winn Dixie shopping cart

As Curtis and I walked around he mentioned that you can adjust the spices in the stuffing recipe to your liking as well, if you don’t like rosemary – leave it out! If you want to add in a bit of sage, go ahead! Recipes are a great guide, but don’t hesitate to put a bit of your personality into it too.

Winn Dixie Tampa

Why is stuffing a traditional holiday side dish?

Stuffing has become a traditional holiday side dish for several reasons, rooted in both culinary history and cultural practices. Here are some key reasons why stuffing is a popular and cherished part of holiday meals:

  • Historical Roots: Stuffing dates back centuries and has been used in various forms in different cultures. The practice of filling the cavity of poultry or other meats with a seasoned mixture has historical roots in European and Middle Eastern cuisines.
  • Reduces Food Waste: Stuffing was historically a practical way to make the most of available ingredients. By combining bread or grains with herbs, spices, vegetables, and sometimes meat, households could create a flavorful and hearty dish using a variety of staple foods.
  • Symbolic Significance: The act of stuffing a bird or other main dish is often symbolic of generosity and plenty. It signifies a bountiful meal and is a way of sharing and celebrating abundance during festive occasions.
  • Comfort and Nostalgia: For many people, holiday meals are an opportunity to enjoy familiar and comforting flavors. Stuffing, with its savory and aromatic qualities, can evoke feelings of nostalgia and provide a sense of comfort during special occasions.
  • Versatility: Stuffing is a versatile dish that can be customized based on regional and family preferences. It can include a variety of ingredients such as bread, herbs, vegetables, fruits, nuts, and sometimes sausage or other proteins. This adaptability allows families to create a stuffing recipe that reflects their own tastes and traditions.
  • Generational Passing of Recipes: Many families have cherished stuffing recipes that have been passed down through generations. The continuation of these recipes fosters a connection to family history and reinforces the importance of traditional holiday dishes.

Essential Ingredients Found in Classic Stuffing Recipes

Stuffing recipes can vary widely based on regional preferences, family traditions, and personal tastes. However, some of the most common ingredients in stuffing include:

  1. Bread or Stuffing Mix:
    • Cubed or torn bread is a primary ingredient in most stuffing recipes. Some people use day-old bread, while others opt for pre-packaged stuffing mixes. Common types of bread used include white, whole wheat, cornbread, or a combination.
  2. Aromatics:
    • Onions and celery are classic aromatic vegetables that add flavor to the stuffing. They are often sautéed in butter or oil before being mixed with the bread.
  3. Herbs:
    • A blend of herbs is crucial for seasoning stuffing. Common herbs include sage, thyme, rosemary, and parsley. Fresh or dried herbs can be used, depending on personal preference.
  4. Broth or Stock:
    • Liquid ingredients like chicken or vegetable broth are used to moisten the stuffing and add flavor. The amount of liquid needed depends on the desired texture of the stuffing—some prefer it moist, while others prefer a drier consistency.
  5. Butter or Oil:
    • Butter or oil is often used for sautéing the aromatics and for moistening the stuffing. It contributes richness and helps enhance the overall flavor.
  6. Salt and Pepper:
    • These basic seasonings are essential for enhancing the flavors of the other ingredients in the stuffing. The amount can be adjusted based on personal taste preferences.
  7. Eggs:
    • Eggs are commonly used as a binding agent in stuffing. They help hold the ingredients together and contribute to the overall texture.
  8. Optional Proteins:
    • Some stuffing recipes include proteins such as cooked sausage, bacon, or ground meat for added flavor and substance. This is especially common in meat-based stuffing variations.
  9. Dried Fruits:
    • Dried fruits like cranberries, raisins, or apricots can add a sweet and chewy element to stuffing, providing a nice contrast to the savory flavors.
  10. Nuts:
    • Chopped nuts, such as pecans, walnuts, or chestnuts, can add crunch and richness to the stuffing. They are a common addition, particularly in holiday stuffing recipes.
  11. Garlic:
    • Garlic, either minced or roasted, can contribute a robust and savory flavor to the stuffing.
  12. Vegetables:
    • Besides onions and celery, other vegetables like carrots, mushrooms, or bell peppers might be included in stuffing for additional flavor and texture.

Need some ideas on how to pair your wine with Curt Stone’s stuffing recipe and turkey dinner? Here is how to pair wine with your holiday meal.

Now, here is Chef Curtis Stone’s Bacon and Green Onion Stuffing Recipe, be sure to Print It and Pin It so that you can make it again and again.

Curtis Stone Stuffing Recipe on Food Wine Sunshine
Print Recipe
5 from 5 votes

Curtis Stone Stuffing Recipe

Prep Time20 minutes
Cook Time1 hour 20 minutes
Total Time1 hour 40 minutes
Course: Side Dish
Servings: 8
Author: Chef Curtis Stone

Ingredients

  • 1 ½ lb. French or Italian bread cut into ¾-inch cubes
  • 12 slices bacon coarsely chopped
  • 2 yellow onions finely chopped (about 3 cups)
  • 5 celery stalks cut into ¼-inch pieces (about 2 ¼ cups)
  • 6 large sprigs of fresh thyme
  • 2 large sprigs of fresh rosemary
  • 6 garlic cloves finely chopped
  • ¾ cup dry white wine
  • 2 ½ cups reduced-sodium chicken broth
  • 1 cup 2 sticks unsalted butter, cut into ½-inch cubes, plus butter to coat baking dish
  • 8 green onions thinly sliced
  • cup finely chopped fresh flat-leaf parsley
  • 2 large eggs lightly beaten

Instructions

  • Preheat oven to 350°F. Butter a 13×9-inch baking dish.
  • Spread bread on 2 large, rimmed baking sheets. Bake for about 15 minutes, or just until dried but not browned. Cool.
  • Meanwhile, heat a large deep skillet over medium-high heat. Add bacon and cook, stirring often, for about 7 minutes, or until crisp. Using a slotted spoon, transfer bacon to a plate. Pour off all but ⅓ cup bacon grease.
  • Add onions to same skillet and cook, stirring occasionally, for about 3 minutes, or until tender. Add celery, thyme and rosemary and cook, stirring occasionally, for about 4 minutes, or until onions are translucent. Stir in garlic and continue cooking, stirring often, for about 6 minutes, or until vegetables begin to brown. Add wine and cook for about 4 minutes, or until wine has evaporated but vegetables are still very moist.
  • Add broth and butter, bring to a simmer, and simmer for about 8 minutes, or until liquid is reduced by half. Transfer mixture to a large bowl and cool slightly; remove and discard thyme and rosemary stems.
  • Stir green onions and parsley into vegetable mixture. Add bread cubes, reserved bacon, 2 tsp. salt and ½ tsp. pepper, and mix well. Mix in eggs. Spread stuffing in prepared baking dish and cover with aluminum foil.
  • Bake for 50 minutes, or until stuffing is heated through and puffed. Remove foil and bake for about 20 minutes, or until golden brown. Serve hot.
  • Enjoy!

Notes

Make It Ahead!
Unbaked stuffing can be made up to 6 hours ahead and refrigerated; add 10 minutes to baking time.
***Here are a few modifications we made to the recipe***
1 loaf of French Bread
1 large yellow onion
8 slices of bacon
1 1/2 cans of chicken broth – if yours looks dry, add more!
We didn’t use rosemary

I hope you enjoy this Bacon and Green Onion Stuffing Recipe as much as my family and I did! I will tell you, that we definitely will be making it again. It was simply delicious.

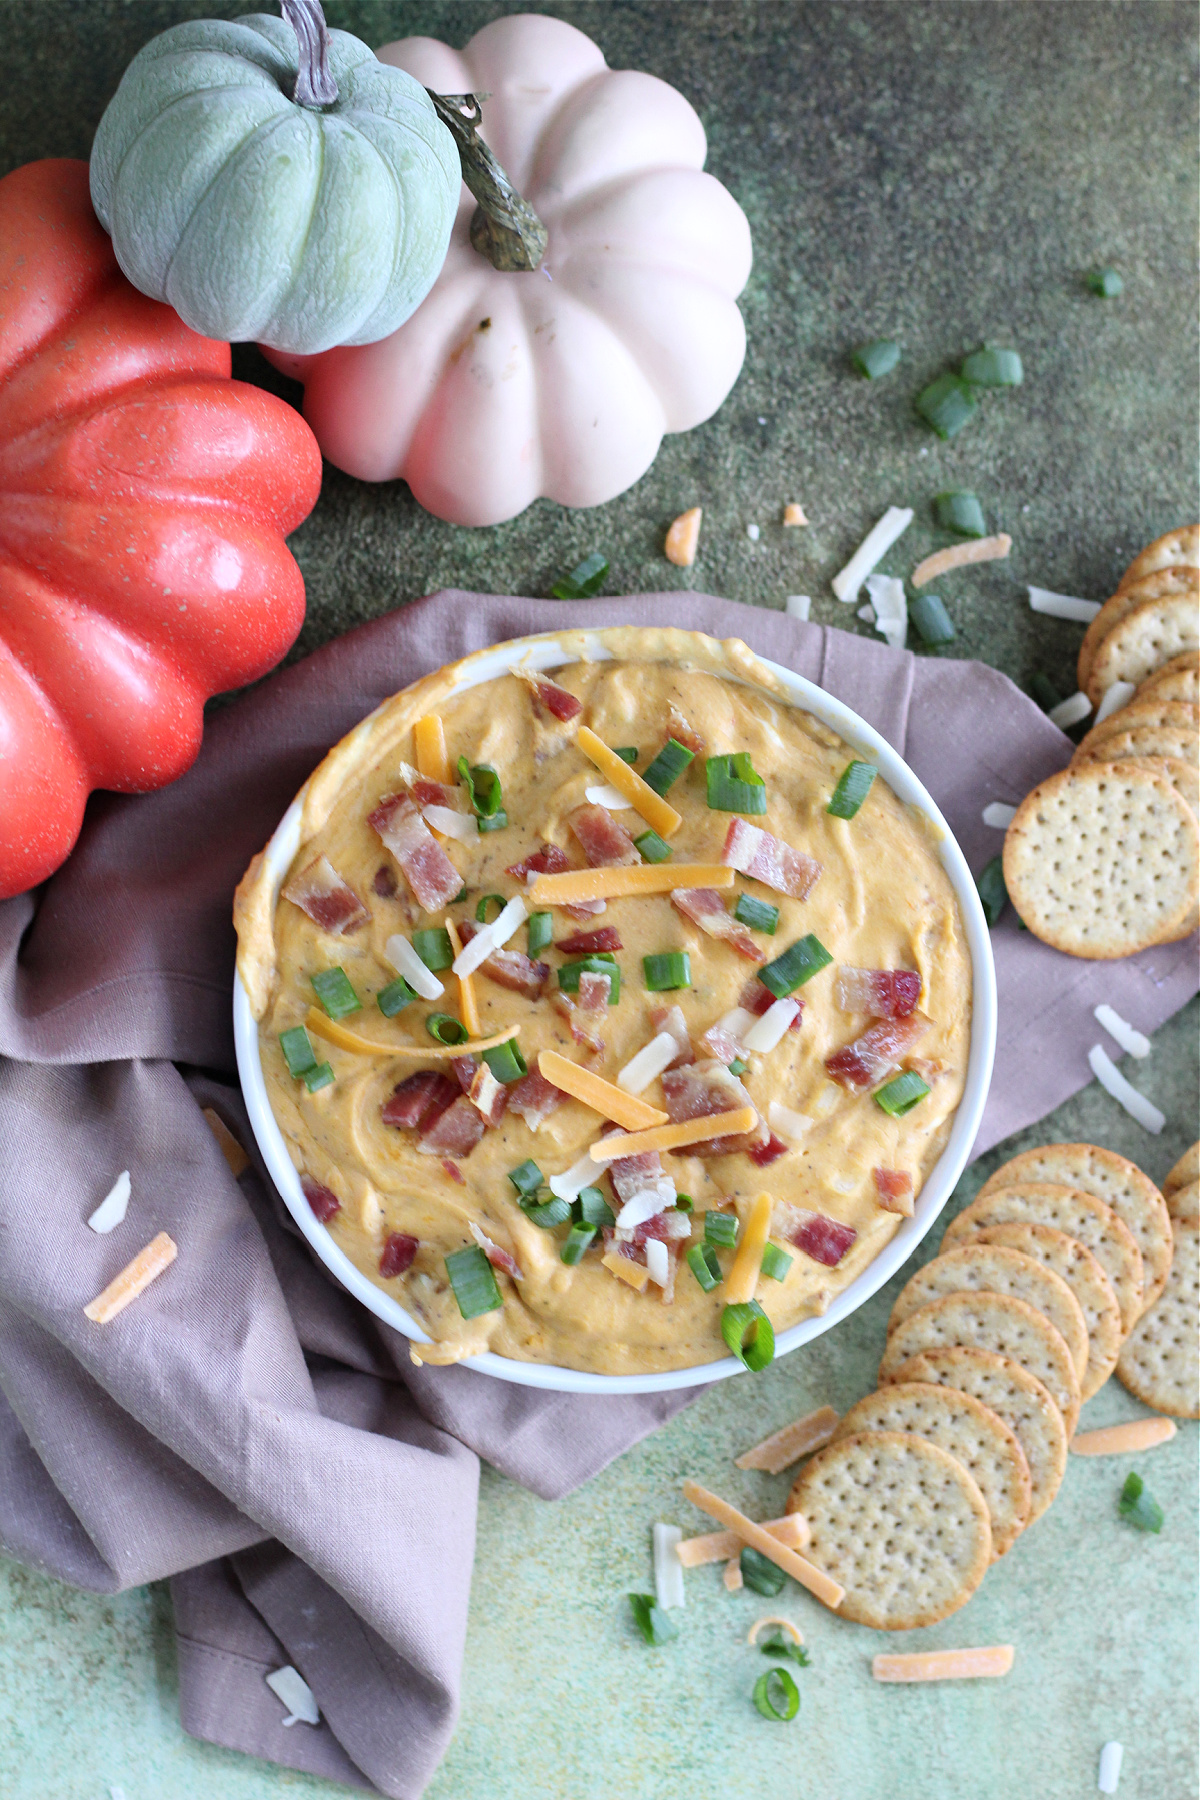
The picture of the stuffing above is courtesy of Winn-Dixie, but I DO have a picture of ours and I have to say, it turned out pretty darn good 😉

Curtis Stone's Stuffing Recipe

If you don’t have the opportunity to make everything from scratch, Winn-Dixie has an amazing bakery department too, I won’t tell if you pick up a fresh pie 😉

Follow Winn-Dixie on Facebook, Twitter, Pinterest, and Instagram for more recipes, savings, and more.

In fact, be sure to check out all the recipes on Food Wine Sunshine and follow me on Facebook, Twitter, Pinterest, and Instagram.

Curtis Stone at Winn-Dixie

DIY Snowman Candle Holder

This post may contain affiliate links, please read our disclosure policy.

DIY Snowman Candle Holder on Food Wine Sunshine

Easy Snowman Candle Holder Craft

The holidays are here and I love finding crafts and decor that are not only easy to make, but inexpensive! This Snowman Candle Holder Craft by my blogger buddy, Famous Ashley Grant, is just that! In fact, you can make it for under $5!

Now, here’s how to make those cute snowman candle holders.

What You Need:

  • White Folk Art Enamels Paint – you can pick this up at a craft store or on Amazon
  • Black Folk Art Enamels Paint – you can pick this up at a craft store or on Amazon
  • Q-tips
  • Glass Votive Candle Holder or small glass – Ashley used the small drinking glasses from Ikea that at the time were just $1.50 for 6!
  • Sponge brush
  • Cookie sheet
  • Styrofoam Plate
  • Rubbing Alcohol

What You Do:

  • Clean the exterior of the Glass Votive Candle Holder with rubbing alcohol.
  • Pour a little white paint onto a Styrofoam Plate. Sponge it onto the exterior of the Glass Votive Candle Holder. Don’t paint the bottom. (For best results dab the sponge to coat the surface, don’t stroke in lines.) Let it sit to air dry 30 minutes.
  • Pour a little black paint onto a Styrofoam Plate. Take the Q-tip and make black dots on the exterior to create a face. Let is sit to air dry an hour
  • Place a cookie sheet into a COOL oven and place the air dried painted candle holder onto the cookie sheet.
  • Close the oven and set the oven to 350 degrees. Then set a timer for 40 minutes.
  • When the timer goes off turn off the oven immediately. Leave the item in the oven until it is completely cooled down.
  • Once the oven is cooled down voila! You have a hand painted Snowman Candle Holder! Add a tea light candle and you’re all set!
  • Enjoy!

A huge THANK YOU for Ashley for sharing this adorable Snowman Candle Holder Craft with us today!

Be sure to follow Food Wine Sunshine on Facebook, Twitter, Pinterest, Google + and Instagram for more DIY, fabulous recipes and more!

Looking for more Holiday Decor Ideas and Crafts for under $5? Check out this eBook Five Buck Christmas.  The ebook is FREE if you have Kindle unlimited 🙂

How To Become a Ghost Writer and Own Your Own Business

This post may contain affiliate links, please read our disclosure policy.

Ghost Blogging Course

How To Become a Ghost Writer and Own Your Own Business

Do you like to write? Do you love ready blogs and articles? But maybe you don’t want the commitment and cost of running your own online magazine or blog? Or are you a writer and maybe you would like more work at a better pay? Well, then I have something for you to check out…Ghost Writing.

Have you heard of it?

Ghost Writing gives you the opportunity to work whenever and wherever you would like! You write articles and blog posts for others, but you don’t have to worry about the promotion and cost of own the publication!

If you are a writer and want to know how to break into a ghost blogging business, I wanted to tell you about a course from blogger Ashley Grant. She going to give you all the tools and ideas you need to start your ghost blogging business in a weekend. Yep, 48 hours is all you need if you have the hustle and drive it takes to launch your work from anywhere with WiFi ghostblogging business!

Buy Ghost Writing Class

And, since you’re here before the launch, you are getting in at more than 50% off the price the course will be once it’s live. To buy now and get registered at this deep discount, just click the BUY NOW button below. Then, as soon as the course is live, you will receive all the details you need to make your ghost blogging business dream a reality.

Grab the Ghost Writing Business in a Weekend Course at the EARLY BIRD price before it goes live!!! The price will go up to $97 when it’s released, but you can grab it now for $47!

Buy Ghost Writing Class

Be sure to follow me, Food Wine Sunshine, on Facebook, Twitter, Pinterest, Google + and Instagram for helpful tips and more.

Delicious Hot Chocolate Cookies

This post may contain affiliate links, please read our disclosure policy.

Looking for a delicious twist on the traditional cookie recipe? Give your loved ones a Hot Chocolate Cookie this season and be prepared to bake more! While this post is sponsored, all opinions and the recipe are my own!

Tasty Hot Chocolate Cookies

Peppermint Hot Chocolate Cookies

Tis the Season for COOKIES!  The holidays are coming and two of my family’s favorite things are watching Christmas Movies and baking cookies. I will admit, we have been watching holiday movies for over a week now and we have made more than one batch of cookies already 😉 The kids always request their cookies with a cup of hot chocolate, so that got me thinking….how about creating Hot Chocolate Cookies?! All the deliciousness of hot cocoa in a cookie, and have the cookie with a cup of hot cocoa for doubly delicious holiday splendor!

Best Hot Chocolate Cookies

What holiday movies will you be watching this year? Have you seen that there will be a new one this year on Amazon? If You Give a Mouse a Christmas Cookie, will premiering Friday, November 25. You know and love the book If You Give a Mouse a Cookie, so you know you don’t want to miss the holiday special! We have it marked on our calendars 😉 So, make some Hot Chocolate Cookies and gather the family around the TV for the ultimate night of holiday enjoyment.

There are only a few steps in this fun hot cocoa cookie recipe.

Easy Hot Chocolate Cookies

Scoop the dough, and flatten it just a bit before baking.

Peppermint Hot Chocolate Cookies

Cut the marshmallows in half while the cookies are baking.

Hot Chocolate Peppermint Cookies

Gently press the marshmallow into the cookies.

Hot Chocolate Christmas Cookies

Top with your homemade icing.

Best Hot Chocolate Christmas Cookies

Sprinkle on peppermint pieces and let the icing harden a bit.

Easy Hot Chocolate Christmas Cookies

Enjoy!  These hot cocoa cookies are SO good, you may not be able to wait to take a bite.

Before I share my Hot Chocolate Cookies Recipe, I wanted to share a bit more about the Amazon Original holiday special If You Give a Mouse a Christmas Cookie.

Yummy Hot Chocolate Christmas Cookies

If You Give a Mouse a Christmas Cookie is an endearing animated holiday special based on the classic If You Give a Mouse a Cookie book series written by Laura Numeroff and illustrated by Felicia Bond. In the special, it’s holiday time and in Mouse’s house that means Christmas cookies (including a special one for Santa, of course!), caroling with friends…and one nearly-destroyed holiday pageant. Can Mouse and his animal friends save the show without getting utterly distracted along the way? It’s a wild ride as Mouse and his friends reinforce for young viewers the friendship and caring that’s at the heart of the holiday season. Like the books, If You Give a Mouse a Christmas Cookie special is centered on an “if… then” narrative structure that teaches cause and effect and encourages creativity among children.

Now, here is my Hot Chocolate Cookie Recipe, be sure to Print It and Pin It so that you can make it again and again.

Hot Chocolate Cookies on Food Wine Sunshine
Print Recipe
5 from 4 votes

If You Give A Mouse A Christmas Cookie - Give Him Hot Chocolate Cookies

Prep Time15 minutes
Cook Time13 minutes
Total Time28 minutes
Course: Cookies
Author: Tracy @ havingfunsaving.com

Ingredients

Cookie Ingredients

  • 1 box chocolate cake mix
  • 1 stick butter melted
  • 2 eggs
  • 1/2 teaspoon peppermint extract

Icing Ingredients

  • 2 cups powdered sugar
  • 4 tablespoons 1/2 stick unsalted butter, melted
  • 1/4 cup unsweetened cocoa powder
  • 1/4 cup hot water
  • 1/2 teaspoon vanilla extract

Toppings

  • 20 large marshmallows
  • Peppermint candies - crushed

Instructions

  • Preheat oven to 350
  • Prepare standard baking sheet with parchment paper or cooking spray

Cookie Instructions

  • In a large bowl add cake mix, eggs, and melted butter
  • Mix well – the batter will be thick and sticky
  • Use a tablespoon (or a tablespoon sized cookie scoop) to scoop the dough
  • Arrange the cookie balls about 2 inches apart on your baking sheets, then flatten slightly with your fingers or back of spoon
  • Bake cookies about 10 - 12 minutes
  • While the cookies bake, cut the large marshmallows in half
  • When the cookies are done, press one marshmallow half (cut side down) into the center of each cookie
  • Return the cookies to the oven and bake another 1-2 minutes
  • Allow the pan of cookies to cool a few minutes, then transfer cookies to cooling rack

Icing Instructions

  • Combining all icing ingredients in a medium bowl and mix together with a whisk

Decoration Instructions

  • Place wire cooling rack over a baking sheet with wax paper on it for easier clean up
  • Spoon icing onto the top of each marshmallow cookie
  • After icing a few cookies, sprinkle on peppermint pieces before the icing dries
  • Allow icing to set about 30 minutes before serving - just to avoid super messy fingers
  • Enjoy!


Hot Cocoa Cookies

I hope you and your family enjoy these Hot Chocolate Cookies as much as we do!

You will notice that I added Peppermint Extract to my cookies, my family loves peppermint in our hot cocoa, so that just seemed natural for us. If your family doesn’t enjoy peppermint as much as we do (is that possible?!) you can feel free to leave that out.

These Hot Chocolate Cookies are chocolatey-delicious with a hint of peppermint and marshmallow which makes them the perfect holiday treat. But don’t be surprised if your family requests them all year long!

How To Make Hot Chocolate Cookies

What is one of your favorite Christmas cookie recipes? 

Be sure to check out all the recipes on Food Wine Sunshine and follow me on Facebook, Twitter, Pinterest, and Instagram.

Chef Curtis Stone Comes To Winn-Dixie Hyde Park

This post may contain affiliate links, please read our disclosure policy.

Award-winning Chef Curtis Stone will visit the newly remodeled Hyde Park Winn-Dixie! Check out his Thanksgiving Recipes and more in store. While this post is sponsored, all opinions and my excitement are my own!

Chef Curtis Stone Comes To Winn-Dixie Hyde Park

Chef Curtis Stone Comes To Winn-Dixie Hyde Park

Oh yes, you read that right! Award-winning Chef Curtis Stone will visit the newly remodeled Hyde Park Winn-Dixie!

The Hyde Park Winn-Dixie store is located at 2100 W. Swann Ave. and Chef Curtis Stone will be hosting a book signing from noon – 2 p.m THIS SATURDAY, November 19th 2016.

During the event, 10 fans will have a chance to win a signed copy of his cookbook, Good Food, Good Life.

When is the Winn-Dixie Curtis Stone Event:

  • November 19th from 12 (noon) – 2:00 p.m.

Where is the Winn-Dixie Curtis Stone Event:

  • The Hyde Park Winn-Dixie store is located at 2100 W. Swann Ave.

Can’t make the event, but want to know what it’s all about? I will be at Winn-Dixie just prior to the start of the event and will be on Facebook LIVE discussing Chef Curtis Stone’s Thanksgiving Feast Menu and more!

There will also be several of my Tampa Bay Blogger Friends posting live as well, so be sure to follow the hashtags #WinnDixieHydePark #WDThanksgivingFeast #CurtisStone

Here are my social media links, turn in Saturday morning!

Don’t forget to follow Chef Curtis Stone too! Find him on Instagram, Pinterest, and Twitter.

Check out the Thanksgiving Feast Recipes online and be sure to print and pin Chef Curtis Stone’s Turkey with Sage-Brown Butter Gravy Recipe here.

If you are one of my Central Florida Readers, mark your calendars for SUNDAY! Curtis Stone will also visit the Winn-Dixie store located at 951 W State Rd 434 in Longwood and host a book signing from 1 p.m. – 3 p.m.

Chef Curtis Stone’s Turkey with Sage-Brown Butter Gravy Recipe

This post may contain affiliate links, please read our disclosure policy.

This is Chef Curtis Stone’s Turkey with Sage-Brown Butter Gravy Recipe, and you are going to love it! This easy turkey recipe is perfect for Thanksgiving, Christmas or any day you want to treat the family to something extra special at dinner.
Curtis Stone's Turkey with Sage-Brown Butter

Chef Curtis Stone’s Turkey with Sage-Brown Butter Gravy

Thanksgiving is just a few days away and I am thinking that a delicious turkey dinner is in your near future.  If you are looking for a new way to prepare your turkey, or maybe this is the first year you have taken on the cooking, I have a recipe for you all that you will definitely want to check out.   When I was at Winn-Dixie earlier this week I picked up the Winn-Dixie Flavor Magazine that was filled with delicious recipes from Chef Curtis Stone.

The turkey looked so amazing, I wanted to share the recipe here on the blog too.  The picture and recipe are courtesy of Winn-Dixie and Chef Curtis Stone.

Chef Curtis Stone’s Thanksgiving Feast is available for customers looking for delicious and convenient recipe options this Thanksgiving. The fresh ingredients and easy directions for his original Turkey with Sage-Brown Butter Gravy, delicious sides and dessert are available at BI-LO, Harveys and Winn-Dixie stores and website.

Now, here is Chef Curtis Stone’s Turkey with Sage-Brown Butter Gravy Recipe, be sure to Print It and Pin It so that you can make it again and again.

Curtis Stone's Turkey with Sage-Brown Butter Recipe Featured on Food Wine Sunshine
Print Recipe
4.80 from 5 votes

Chef Curtis Stone's Turkey with Sage-Brown Butter Gravy

Serve turkey dinner like a famous chef, Chef Curtis Stone. This Turkey with Sage-Brown Butter Gravy is the perfect addition to your holiday table.
Prep Time10 minutes
Cook Time2 hours 45 minutes
Total Time2 hours 55 minutes
Course: Dinner
Cuisine: Christmas, Thanksgiving
Keyword: holidays, turkey
Servings: 8
Author: Chef Curtis Stone

Ingredients

  • 1 14- to 16- lb. whole turkey
  • 2 yellow onions coarsely chopped
  • 2 carrots coarsely chopped
  • 3 celery stalks coarsely chopped
  • ¾ cup 1½ sticks unsalted butter, divided
  • ½ oz. fresh sage stems and leaves separated (about 1/3 cup leaves; stems reserved)
  • 1 tbs. Worcestershire sauce
  • 4 cups reduced-sodium chicken broth
  • 1/3 cup unbleached all-purpose flour

Instructions

TO ROAST TURKEY

  • Preheat oven to 425˚F.
  • Thoroughly pat turkey dry. Season inside of turkey with salt and pepper. Stuff main turkey cavity with half of chopped onions, carrots, and celery and tie turkey legs together with butcher’s twine. Place remaining onions, carrots,
  • and celery in a large roasting pan with a V-rack. Place turkey on rack.
  • In a small saucepan, melt ½ cup butter with sage stems and Worcestershire sauce. Remove pan from heat. Brush some
  • melted butter mixture all over turkey and sprinkle turkey all over with salt and pepper.
  • Place pan in oven and roast for 30 minutes. Reduce oven temperature to 325°F and roast, basting turkey every 30 minutes with melted butter mixture until a meat thermometer reads 165°F when inserted into part of thigh nearest to thigh-hip joint, 1 hour 45 minutes to 2 hours (if skin starts to get dark in spots, cover with foil).
  • Transfer turkey to a carving board (do not clean out roasting pan), and rest at room temperature for 20 minutes before carving.

TO MAKE GRAVY

  • Carefully pour pan drippings from roasting pan into measuring cup and set aside for about 5 minutes to allow oil to rise above juices; spoon off oil and reserve pan juices. Set roasting pan on stove over medium-high heat. Add pan juices and broth and bring to a simmer, stirring to scrape up brown bits. Strain pan juices and discard solids.
  • In a medium heavy saucepan over medium-high heat, melt remaining ¼ cup butter. Swirl in pan until butter is light brown, about 2 minutes. Stir in sage leaves and cook for about 1 minute, or until sage leaves are crisp. Remove pan from heat and, using a slotted spoon, remove sage leaves. Sprinkle sage leaves with salt and reserve.
  • Return pan to medium heat, stir in flour, and cook, stirring, for 1 minute. Whisk in pan juices and bring mixture to a simmer. Simmer for about 3 minutes, or until gravy thickens slightly. Season gravy with salt and pepper.

TO SERVE

  • Carve turkey and serve with gravy and crispy sage leaves.

Notes

**TIPS**
Butter mixture can be made up to 1 day ahead, covered and refrigerated. Rewarm before using.
Turkey can be cooked up to 40 minutes before carving, held in a warm place.
Gravy can be made up to 40 minutes ahead, kept warm.

I hope you enjoy this Turkey with Sage-Brown Butter Gravy Recipe!

Curtis Stone's Bacon and Green Onion Stuffing

I recommend making Curtis Stone’s Bacon and Green Onion Stuffing Recipe to serve with that beautiful turkey!

In fact, be sure to check out all the recipes on Food Wine Sunshine and follow me on Facebook, Twitter, Pinterest, and Instagram.

6 Ingredient No Bake Pumpkin Cheesecake

This post may contain affiliate links, please read our disclosure policy.

With just 6 ingredients and 15 minutes you can have this delicious No Bake Pumpkin Cheesecake prepped. This easy dessert recipe will soon be a family favorite.

Easy No Bake Pumpkin Cheesecake

Easy No Bake Pumpkin Cheesecake

Oh how I love cheesecake. But I rarely eat it and almost never make it. Why? Because of the insane calorie-count and the extreme amount of effort to make it at home. So, I set out to figure out how to make a delicious cheesecake at home that isn’t loaded with calories. And since it’s the season of all-things-pumpkin I figured a Pumpkin Cheesecake would be perfect. Oh…and it is 🙂

Best No Bake Pumpkin Cheesecake

Not only does my Pumpkin Cheesecake require no baking and just 6 ingredients (7 if you count the store bought crust), but you won’t feel guilty for having more than one bite! And as added bonus, you will have this No-Bake Pumpkin Cheesecake prepped in under 30 minutes, in fact, you can probably have it prepped it about 15 minutes!

Tasty No Bake Pumpkin Cheesecake

So, are you ready to get cooking? Well, actually there is no “cooking” but you don’t have to tell your guests that you didn’t slave over it for hours 😉

No Bake Pumpkin Cheesecake

Here is my No Bake Pumpkin Cheesecake Recipe, be sure to Print It and Pin It so that you can make it again and again.

No Bake Pumpkin Cheesecake Recipe on Food Wine Sunshine
Print Recipe
5 from 11 votes

No Bake Pumpkin Cheesecake

This no bake pumpkin cheesecake is easy to make and only requires 6 ingredients!
Prep Time15 minutes
Chill Time4 hours
Total Time15 minutes
Course: Dessert
Keyword: cheesecake, dessert, dessert recipe, easy recipe, pumpkin
Servings: 8
Author: Tracy

Ingredients

  • 1 package 8 oz 1/3 less fat cream cheese
  • 1/3 cup granulated sugar
  • 1 15 oz. can pumpkin puree
  • 2 tsp pumpkin pie spice
  • 1 tsp vanilla
  • 8 oz lite whipped topping 1 container
  • 1 graham crust crust - I used a pre-made store crust

Instructions

  • Mix cream cheese and granulated sugar with electric mixer on medium speed until creamy
  • Add pumpkin, spices and vanilla into the small mixing bowl and beat until smooth
  • Gently fold in whipped topping with spatula until it's blended in
  • Spread cheesecake mix evenly into pie crust
  • Cover and refrigerate at least 4 hours before serving
  • Enjoy!


Easiest No Bake Pumpkin Cheesecake

I hope you enjoy this No Bake Pumpkin Cheesecake Recipe as much as we do!

Healthy No Bake Pumpkin Cheesecake

As you as see, I used low-fat cream cheese and lite whipped topping in my recipe to reduce the fat and calorie content.  And, pumpkin is actually very good for us, loaded with fiber and Vitamin A and Vitamin C this cheesecake recipe is one you don’t have to feel guilty about making or eating.

Best Healthy No Bake Pumpkin Cheesecake

Have you ever made cheesecake before?  What is your favorite no-bake cheesecake recipe?

Looking for more holiday dessert ideas?

Peppermint Chocolate Icing in the Cake Recipe

Peppermint Chocolate Icing in the Cake

Be sure to check out all my delicious recipes and follow me on Facebook, Twitter, Pinterest, and Instagram.

Pumpkin Protein Smoothie – Nutritious & Delicious

This post may contain affiliate links, please read our disclosure policy.

Did you know that pumpkin is really good for you? Pumpkin is loaded with fiber and low in fat. This Pumpkin Protein Smoothie is a Nutritious & Delicious smoothie to add to your day.

Healthy Pumpkin Protein Smoothie

Pumpkin Protein Smoothie – Nutritious & Delicious

I have a new smoothie recipe for you all!  I know, I know, it’s been awhile, but I have been enjoying my Smoothie Freezer Packs lately and added with some travel, I just haven’t had to make any new creations.  Until now.  And since it’s Fall, I decided to get really crazy and make a PUMPKIN SMOOTHIE.  I am not talking a milkshake that is loaded with a million calories, although I wouldn’t mind trying one of those one day 😉  I am talking about a nutritious and delicious SMOOTHIE.

Pumpkin Protein Smoothie recipe

Did you know that pumpkin is actually really good for us?  Pumpkin is loaded with Vitamin A and Vitamin C, has a ton of fiber, it’s low in calories, pumpkin has carotenoids – which is good for our skin, and it is loaded with the refueling nutrient potassium – so this smoothie also makes for a wonderful post-workout drink!

Easy Pumpkin Protein Smoothie

Yes, there are some veggies added into this smoothie, you all know that I toss in carrots and cucumbers into just about every single smoothie I make because not only are they good for us and give us an added dose of nutrients, but they don’t compromise the overall taste and flavor of the smoothie.

Best Pumpkin Smoothie

Now, here is my Pumpkin Protein Smoothie Recipe, be sure to Print It and Pin It so that you can make it again and again.

Pumpkin Protein Smoothie
Print Recipe
5 from 2 votes

Pumpkin Protein Smoothie - Nutritious & Delicious

Did you know that pumpkin is really good for you? Pumpkin is loaded with fiber and low in fat. This Pumpkin Protein Smoothie is a Nutritious & Delicious smoothie to add to your day.
Prep Time5 minutes
Total Time5 minutes
Course: Smoothie
Keyword: healthy, protein shake, protein smoothie, pumpkin, smoothie
Servings: 1
Author: Tracy

Ingredients

  • 5-6 baby carrots
  • 4-5 slices of cucumber
  • 1/2 banana
  • 1/2 cup pumpkin puree
  • 4 ice cubes
  • 4 - 6 oz of skim milk
  • 1 scoop your favorite vanilla protein powder
  • 1/4 teaspoon turmeric
  • 1/4 teaspoon chia seeds
  • 1/4 teaspoon cinnamon

Instructions

  • Place all the ingredients as listed above into your favorite blending device, I used the Nutri Ninja® Nutri Bowl™ DUO™ with Auto-iQ Boost™
  • Blend until smooth - with the Nutri Ninja Auto iQ, I just hit the button "SMOOTHIE" it actually stops when it's done, no guess work!
  • Enjoy

Notes

*If you don't have protein powder, you can use 3/4 cup non-fat Greek vanilla yogurt and add in a 1/4 teaspoon pure vanilla extract.

Protein Smoothie with pumpkin

I hope you enjoy this Pumpkin Protein Smoothie as much as I do!

I have been a fan of Nutri Ninja for years and am loving that DUO gives me the option to make my smoothies and so much more! Be on the look out for another recipe soon 😉

Ninja Auto iQ Blender for smoothies

At the touch of a button, you can bring together a diverse selection of fresh ingredients all in one bowl creating a variety of snacks, meals & treats. I love that the Nutrient Extraction unlocks hidden nutrients by breaking ingredients down, creating delicious, nutrient-rich juices and smoothies. So, I am getting the most out of what I am making!

Healthy Protein Smoothie with pumpkin

What are some of your favorite smoothie recipes? Have you ever added pumpkin to a smoothie?

Yummy Pumpkin Protein Smoothie

While I did receive the Nutri Ninja Nutri Bowl DUO with Auto-iQ Boost for review, all opinions and this recipe are my own.

Where to buy:

  • Amazon
  • In store at your favorite retailer

Best Pumpkin Protein Smoothie

Check out all the delicious smoothie recipes on Food Wine Sunshine and follow me on Facebook, Twitter, Pinterest, and Instagram.

Looking for more Pumpkin Recipes?

No Bake Pumpkin Protein Bites

No Bake Pumpkin Protein Bites

Pumpkin and Bacon Dip Appetizer

Savory Pumpkin and Bacon Dip Appetizer

No Bake Pumpkin Cheesecake

No Bake Pumpkin Cheesecake

Pumpkin and Bacon Dip: A Warm, Cheesy, and Irresistible Fall Favorite

This post may contain affiliate links, please read our disclosure policy.

Warm, creamy, and loaded with flavor, ready in under 20 minutes, this savory Pumpkin and Bacon Dip is the ultimate fall appetizer, easy to make and perfect for entertaining! While this post is sponsored by Florida Milk, my love of all things savory and pumpkin and the recipe are my own.

Fall party appetizer spread featuring pumpkin and bacon dip, and rustic fall decor

If you love all things pumpkin but crave something savory instead of sweet, this Pumpkin and Bacon Dip is about to become your new fall favorite. While pumpkin spice desserts often steal the spotlight this time of year, this dip brings together the cozy warmth of pumpkin with the irresistible flavor of smoky bacon and a touch of spice. It’s creamy, comforting, and incredibly easy to make, everything you want in a fall appetizer.

Whether you’re hosting a cozy dinner party, watching football with friends, or planning a Thanksgiving appetizer spread, this savory pumpkin dip recipe will steal the show.

Creamy savory pumpkin dip with bacon and cheese surrounded by crackers for dipping

A Fall Appetizer Worth Falling For

When the weather cools down and pumpkin-themed everything hits the shelves, most people reach for sweet recipes. And while I love a good Sweet Pumpkin Dip (you can find mine here on the blog!), sometimes you just need something with a little kick.

That’s where this Pumpkin and Bacon Dip Appetizer comes in. It’s rich, creamy, slightly smoky, and has just enough heat from the jalapeño and red pepper flakes to keep things interesting. The pumpkin puree adds a gorgeous color and smooth texture, while the bacon brings that savory depth we all know and love.

Bonus? This easy fall dip recipe is made with ingredients you probably already have on hand — cream cheese, cheddar cheese, onion, milk, and pantry seasonings. It’s a simple yet impressive appetizer that comes together in minutes.

Savory pumpkin dip with bacon and cheese served on a crispy cracker

Ingredients You’ll Need for Pumpkin and Bacon Dip

This savory dip comes together with just a few simple ingredients… many you may already have on hand. Each one adds to that cozy, fall-inspired flavor that makes this recipe so special.

Here’s what you’ll need:

  • Pumpkin puree: Use pure pumpkin (not pumpkin pie filling) for that rich, earthy base and signature orange color.
  • Cream cheese: Softened cream cheese gives this dip its smooth, creamy texture.
  • Cheddar cheese: Adds cheesy sharpness and helps create that irresistible melted top.
  • Florida Milk: A splash of milk keeps everything perfectly creamy and balanced – plus, it supports our local Florida dairy farmers!
  • Bacon: Cooked and crumbled for smoky, salty flavor in every bite.
  • Sweet onion: Brings a little sweetness that complements the pumpkin.
  • Jalapeño: Optional, but adds a subtle heat that makes the flavors pop.
  • All-purpose seasoning: A simple way to tie all the flavors together.
  • Red pepper flakes: Adjust to your spice level – a little goes a long way 😉
  • Green onions: Fresh and colorful, perfect for garnish.
Pumpkin and Bacon Dip served warm in a white baking dish topped with chopped green onions and bacon

Serving Suggestions

This Savory Pumpkin and Bacon Dip is versatile enough to serve at any fall get-together. I personally love it warm, but it’s also delicious chilled, perfect for making ahead for a party.

Here are a few ways to serve it:

  • With sliced crusty French bread or baguette rounds
  • Alongside pretzel crisps or crackers
  • As a dip for fresh veggies like carrots, celery, or bell peppers
  • Spread on warm crostini and topped with a little extra bacon for a bite-sized appetizer
Close-up of baked pumpkin dip showing melted cheddar and crispy bacon pieces

Why You’ll Love This Pumpkin Dip

There are plenty of reasons this pumpkin bacon dip deserves a spot at your fall table:

  • It’s simple to make with everyday ingredients.
  • It’s ready in under 20 minutes – perfect for last-minute guests.
  • Thanks to melty cheddar, cream cheese, and wholesome Florida Milk, every scoop is rich, smooth, and perfectly indulgent.
  • The combination of pumpkin, bacon, and heat is pure comfort food.
  • It’s festive and flavorful, making it perfect for Thanksgiving, Halloween parties, or winter gatherings.
  • You can adjust the spice level to suit your family’s taste.

This dip is proof that pumpkin isn’t just for sweets – it’s a versatile ingredient that shines in savory dishes too!

Golden bubbly pumpkin and bacon dip fresh from the oven with green onion and bacon garnish

Make It Your Own

Like any good recipe, this one is easy to customize. Here are a few ideas:

  • Add herbs like sage or thyme for an earthy flavor.
  • Swap cheddar for gouda or pepper jack to change the flavor profile.
  • Use turkey bacon for a lighter version.
  • Top with toasted pecans or pumpkin seeds for extra crunch.

However you make it, this Savory Pumpkin and Bacon Dip Appetizer is sure to become a fall favorite at your table.

Now, here is my Pumpkin and Bacon Dip Recipe. Be sure to Print It and Pin It so that you can make it again and again.

Fall party appetizer spread featuring pumpkin and bacon dip, and rustic fall decor
Print Recipe
5 from 3 votes

Savory Pumpkin and Bacon Dip Appetizer

A creamy, savory twist on classic pumpkin dip! Made with pumpkin puree, bacon, cheese, and a hint of spice, this Pumpkin and Bacon Dip is an easy and flavorful fall appetizer that everyone will love.
Prep Time5 minutes
Cook Time10 minutes
Course: Appetizer
Keyword: bacon, easy appetizer, fall, pumpkin
Servings: 12
Calories: 1176kcal
Author: Tracy

Ingredients

  • 1 cup pure pumpkin puree
  • 8 oz 1/3 less fat cream cheese
  • 1/2 cup sharp cheddar cheese
  • cup whole milk
  • cup bacon cooked and chopped
  • cup sweet onion chopped
  • 1 jalapeno diced, seeds removed if desired
  • 1 tsp red pepper flakes adjust as needed
  • ½ tbsp all-purpose seasoning
  • 1 tbsp green onions diced – for garnish

Instructions

  • Preheat oven to 400°.
  • Add all ingredients to a mixing bowl.
  • Stir to blend well.
  • Adjust seasonings as desired.
  • Place dip in an oven-proof dish.
  • Bake for 10 minutes or until dip is heated through.
  • Serve with baguette or your favorite crackers.
  • Enjoy!

Notes

Leftovers are also delicious cold, no need to reheat!

Nutrition

Calories: 1176kcal | Carbohydrates: 51g | Protein: 47g | Fat: 89g | Saturated Fat: 44g | Polyunsaturated Fat: 8g | Monounsaturated Fat: 28g | Trans Fat: 0.1g | Cholesterol: 241mg | Sodium: 1787mg | Potassium: 1540mg | Fiber: 9g | Sugar: 29g | Vitamin A: 40913IU | Vitamin C: 31mg | Calcium: 926mg | Iron: 5mg

Fall is the season of comfort food, and this pumpkin and bacon dip captures all the best flavors of the season – creamy, smoky, and perfectly spiced. It’s easy to make, crowd-pleasing, and the kind of appetizer that disappears fast at any party.

So grab a can of pumpkin puree, crisp up some bacon, and get to cooking – because this dip is too good not to share.

Pumpkin Fluff and Savory Pumpkin Dip served with crackers and fresh produce

Got More Pumpkin? Try This Next!

If you still have some pumpkin puree left, don’t let it go to waste – make dessert! My Pumpkin Fluff Recipe is a creamy, fluffy, fall favorite that’s perfect for apple slices, graham crackers, or pretzels. It’s everything you love about pumpkin pie, but easier (and more fun!) to share.

This creamy pumpkin and bacon dip gets its irresistible richness from Florida Milk… fresh, local, and full of flavor. As a proud Florida girl, I love using locally produced ingredients whenever I can. Supporting Florida farmers means fresher food for our families and stronger communities all year long.

Be sure to check out Florida Milk for more dairy-licious recipes and follow on Instagram, Facebook and Pinterest.

And while you are at it, check out all the recipes on Food Wine Sunshine and follow me on Facebook, Pinterest and Instagram for more FOOD WINE AND SUNSHINE.

Common Grapes Used For Making Wine

This post may contain affiliate links, please read our disclosure policy.

There are thousands of grape varieties that are currently used for making wine, however there are a few common grapes that are used for making wine. Learn more about the history, grapevines and more.
Common Grapes Used For Wine

Common Grapes Used For Making Wine

The grapevine has been used throughout history as both food and wine; today, there are two main varieties of grapevines used to make wine.

The grapevine has earned many mentions in history for its use in wine, as a food and for medicinal purposes; however, there was only one type of grape that was used to make wine until early European settlers began to colonize eastern North America. The type of grapevine that was used to make wine in Europe, Vitis vinifera, was unable to survive in the colder, wetter climate of North America and was also subject to disease. Consequently, another variety of grape emerged for winemaking, Vitis labrusca.

History of Wine Making in Europe

According to some historical sources, the ancient Egyptians depicted winemaking in Egyptian mosaics; in addition, some of the ancient Romans, such as Pliny the Elder (23 A.D. – 79 A.D.) and Pliny the Younger (61 A.D. – 112 A.D), recorded details of how to make wine and the types of grapevine to use for winemaking.

However, the first recorded history of the commercialization of winemaking appears to be around 600 B.C. Grapevines made their way to modern-day Europe and some countries in North Africa via Asia. Favorable climates for growing grapevines in the Mediterranean meant that today many parts of France, Italy, and Spain are well known for the production of wine.

Vitis Vinifera for Wine Making

The common grapevine, Vitis vinifera, was historically the only variety of grape used to make wine. Vitis vinifera is a long-stemmed woody vine (known as a liana) that grows to a height of up to 100 feet. It is a deciduous climbing plant. The fruit of the grapevine is a berry and is green, purple or red in color. The berry, or grape, is the part of the plant that is used to make wine. There are over 3,000 cultivated varieties of Vitis vinifera.

Vitis Labrusca for Wine Making

Fox grape, Vitis labrusca, is native to the eastern United States. Early European settlers in North America discovered that Vitis vinifera was attacked by the insect phylloxera, Dactylospheara vitifolia, and therefore they turned to the native fox grape for winemaking. Fox grape is most well known as the source of Concord grapes and for its “foxy” aroma that distinguishes it from the common grapevine. Vitis labrusca is common in most of the eastern states of America and Canada and is also found growing wild in Utah.

Common Grapes Used For Wine Making

Types of Grapes Used for Making Wine

The thousands of grape varieties that are available today to make wine usually originate from the Vitis vinifera and Vitis labrusca plant species in the Vitaceae plant family. Grapevines for winemaking can be found worldwide, depending on the climate and growing conditions, but no matter which country a wine comes from, wines such as Merlot, Cabernet Sauvignon, Chardonnay, and Sauvignon Blanc can usually be traced back to one of two main varieties of grapevines. Vitis vinifera or Vitis labrusca. The grapevine, like several other plant species such as coffee and barley, is used to make one of the world’s favorite beverages.

Did you know that there were several different types of grapes used for making wine?

Common Grapes Used For Making Wine

Be sure to check out Food Wine Sunshine on Facebook, Twitter, Pinterest, and Instagram for more wine tips, cocktails, healthy recipes, and fun things to do.

Follow Me!