This post may contain affiliate links, please read our disclosure policy.
Add a little bit of fun to your laundry room with this DIY Laundry Room Sign. Make this wooden laundry room sign yourself in 7 simple steps. This shop has been compensated by Collective Bias, Inc. and its advertiser. All opinions are mine alone. #TryMembersMark #CollectiveBias
DIY Laundry Room Sign
Have you been wanting to buy one of those wooden pallet signs that you see in every decor store but don’t want to pay retail price? Well, you don’t have to. Do it yourself! You only need a few things, and you may actually have them around the house and in less than 10 steps – you’ll be done! That’s right, DIY Wooden Signs are not as hard as you think! And in the end, you will have created your own, one of a kind, do it yourself sign for much less than what the store will charge you.
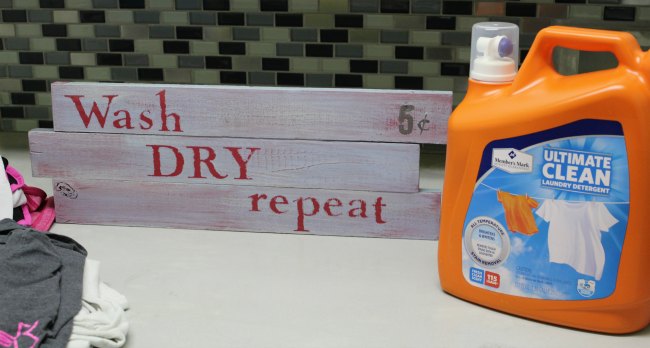
I know we all don’t like to spend time doing laundry, but having your own DIY Laundry Room Sign hanging and Member’s Mark® Ultimate Clean laundry detergent to give you superior cleaning performance at only a fraction of the cost will make you smile at least 😉
Here’s are the materials you’ll need to make your own DIY Laundry Room Sign:
- Wood cut the size you want – Tip* Hardware stores will custom cut the boards for you, free of charge!
- Paint (the colors to match your room for customization.) – You will just need less than 2 oz! Think of the colors you have left from painting rooms in your house or sample size cans at your local home improvement store.
- Paint brushes – You can use any that you have around your house
- Letter Stencils
- Sand Paper – I used 320 grit
- Paint Sealer
- Air stapler
Here are the 7 Easy Steps to make your very own DIY Laundry Room Sign:
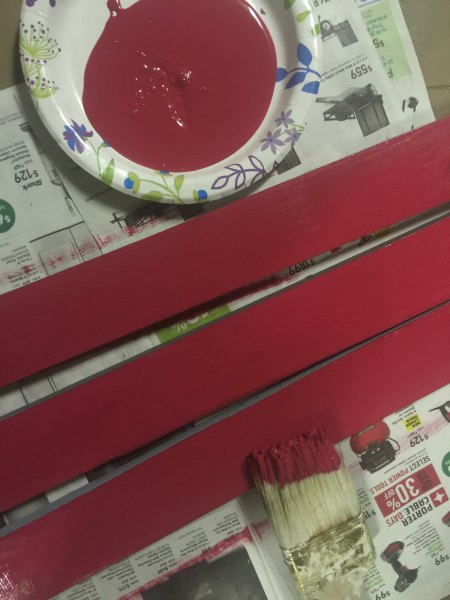
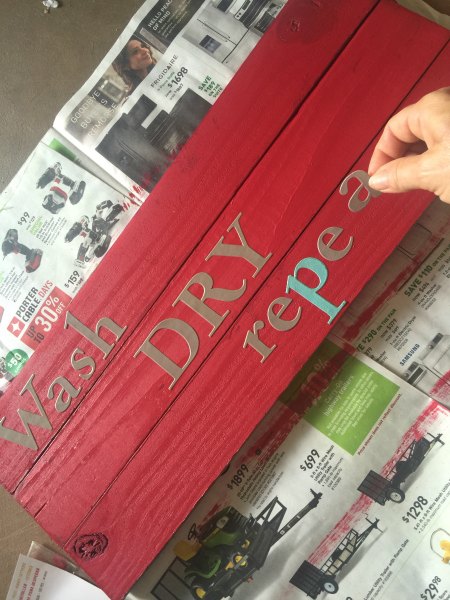
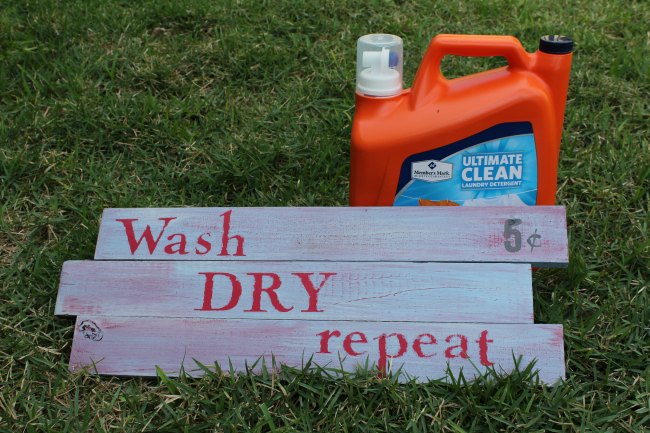
Step 1: Paint the boards the color you want the lettering to be. I recommend doing this on newspaper, so you don’t get paint on anything important 😉 I used Buttercream decor paint in Classic Red but any decor or chalk paint from your local arts and crafts store will work. Let the paint dry approximately 6 hours before applying the stick and peel letters.
Step 2: Place your letters to read what you want your customized sign to say after the paint has dried. There are so many stencil fonts and sizes to choose from. Pick the ones you love! I chose the stick and peel letters. I found these were easier for this project. I bought these from Michael’s. They have a wide variety of stencils.
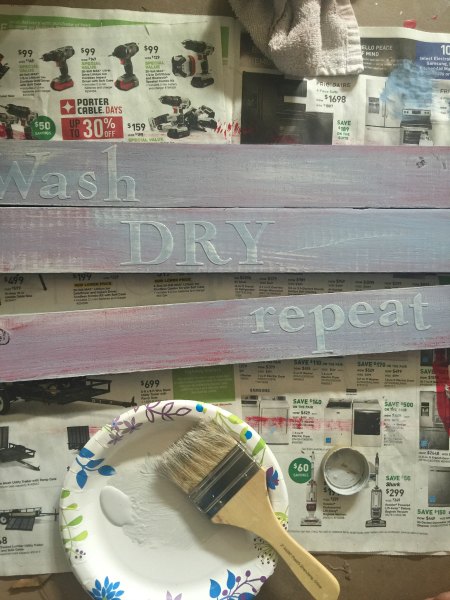
Step 3: After the first coat has dried to the touch (approximately three hours), paint over with another color or colors. I painted over the letters in a Martha Stewart’s Vintage Decor paint in Parisian Blue. It took about three hours to dry and then I brushed on Soft Smoke Gray chalk paint by Buttercream over the blue to give it a little more dimension.
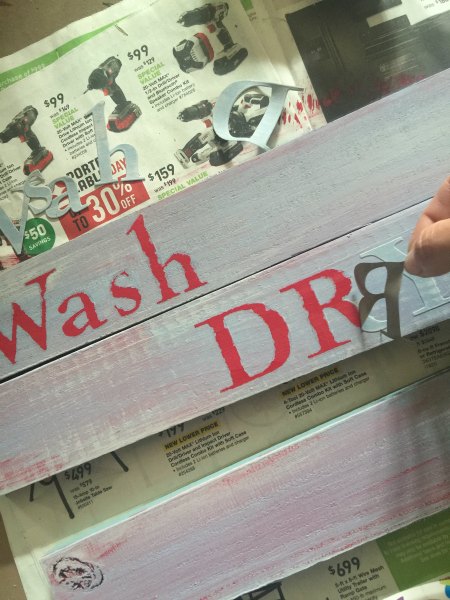
Step 4: Carefully peel the letters off once the paint has dried to the touch. I waited three hours before peeling off the stickers.
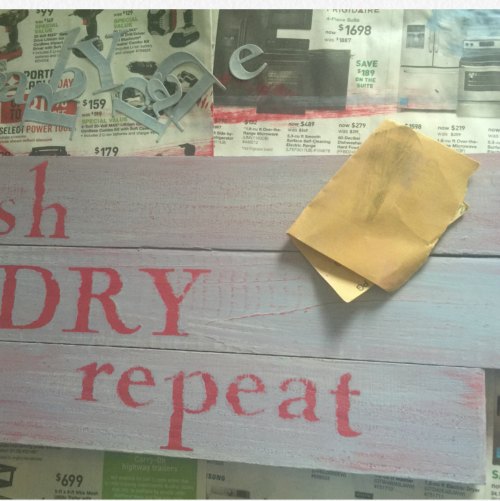
Step 5: Lightly sand and seal. I used a 320 grit sandpaper. The lower the number of the grit, the rougher the paper is and easier it will be to take off the paint, so be careful you don’t sand too hard. Brush off the sanded areas and seal with any type of sealer for protection. I used the Craft Smart Multi-surface Premium Matte Varnish. It takes about 15 minutes to dry.
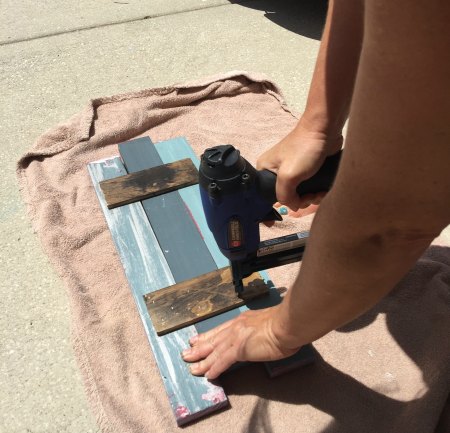
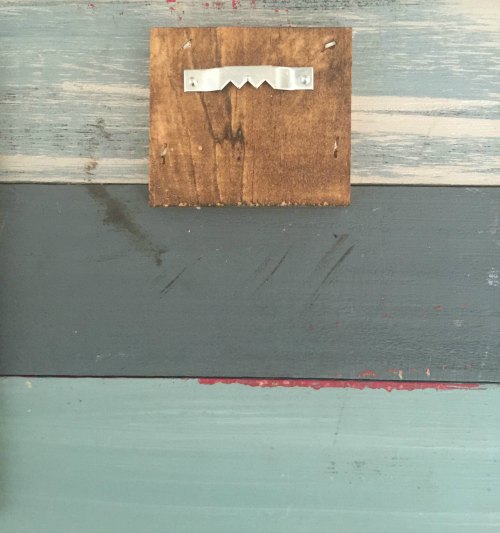
Step 6: Staple your boards together. I found these slender boards at my local home improvement store. Make sure you have slender pieces so it lays flat against the wall when hanging. I had my husband cut them to fit across all three boards and then I stapled them with the air stapler that’s connected to my air compressor. I used five staples per each section. So on each slender board, there are 15 staples each. I then cut another smaller piece and stapled it to the top (4 staples sufficed) to add my hook to hang the sign. You can get these hooks at your local hardware stores or in any hardware department.
Step 7: Hang and enjoy!!
Warning: Doing a DIY sign may cause you to love creating more signs for your home.
Be sure to Pin and Print these easy to follow steps:
- Wood cut the size you want – Tip* Hardware stores will custom cut the boards for you, free of charge!
- Paint (the colors to match your room for customization.) – You will just need less than 2 oz! Think of the colors you have left from painting rooms in your house or sample size cans at your local home improvement store.
- Paint brushes – You can use any that you have around your house
- Letter Stencils
- Sand Paper – I used 320 grit
- Paint Sealer
- Air stapler
- Paint the boards the color you want the lettering to be. I used Buttercream decor paint in Classic Red but any decor or chalk paint from your local arts and crafts store will work. Let the paint dry approximately 6 hours before applying the stick and peel letters.
- Place your letters to read what you want your customized sign to say after the paint has dried. There are so many stencil fonts and sizes to choose from. Pick the ones you love! I chose the stick and peel letters. I found these were easier for this project. I bought these from Michael’s. They have a wide variety of stencils.
- After the first coat has dried to the touch (approximately three hours), paint over with another color or colors. I painted over the letters in a Martha Stewart’s Vintage Decor paint in Parisian Blue. It took about three hours to dry and then I brushed on Soft Smoke Gray chalk paint by Buttercream over the blue to give it a little more dimension.
- Carefully peel the letters off once the paint has dried to the touch. I waited three hours before peeling off the stickers.
- Lightly sand and seal. I used a 320 grit sandpaper. The lower the number of the grit, the rougher the paper is and easier it will be to take off the paint, so be careful you don’t sand too hard. Brush off the sanded areas and seal with any type of sealer for protection. I used the Craft Smart Multi-surface Premium Matte Varnish. It takes about 15 minutes to dry.
- Staple your boards together. I found these slender boards at my local home improvement store. Make sure you have slender pieces so it lays flat against the wall when hanging. I had my husband cut them to fit across all three boards and then I stapled them with the air stapler that’s connected to my air compressor. I used five staples per each section. So on each slender board, there are 15 staples each. I then cut another smaller piece and stapled it to the top (4 staples sufficed) to add my hook to hang the sign. You can get these hooks at your local hardware stores or in any hardware department.
- Hang and enjoy!!
I mentioned Member’s Mark Ultimate Clean Liquid Laundry Cleaner above, are you familiar with this money-saving laundry detergent yet? Well, let me introduce you! Member’s Mark Ultimate Clean Liquid Laundry Cleaner it was developed with a patented Ultimate Clean Technology that locks on tough stains and lifts them out in all temperature settings. Which is perfect for my household, as my son just LOVES sliding into bases lately as baseball, and I think my daughter wears half of her dinner nightly!
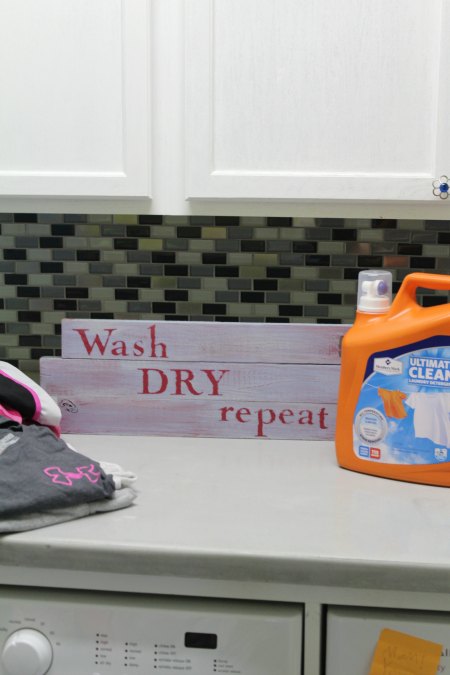
Since I spend a lot of time in the laundry room, folding, sorting, etc. I love my DIY Laundry Room Sign in there with me to add a bit of fun. And my Member’s Mark Ultimate Liquid Laundry Cleaner keeps me saving a few extra pennies (because it’s priced great and works AMAZING!), plus, the convenient, no-mess dispenser and dosing cup ensures that I don’t use any more than I have to.
Where do you find Member’s Mark Ultimate Clean Liquid Laundry Cleaner? In store at Sam’s Club or Online. Member’s Mark detergent is HE compatible and safe for all washing machine styles.
Have you ever made your own DIY Wooden Sign before? Now that you have this easy Laundry Room Sign tutorial, do you think you will give it a try?
Be sure to check out Food Wine Sunshine on Facebook, Twitter, Pinterest, Google + and Instagram for more helpful tips, healthy recipes, and more.






My MIL would totally make this. And I think I could too. SO cute!
I think you could too! The steps are easy and it doesn’t take much time – have fun with it 🙂
Totally loving this DIY sign. Very cute!
This is adorbs and tres chic I must say! Not even that hard to make 🙂
I love this and I love reusing old wood to make something beautiful, I do have a laundry room that could use a sign so I might just make me one .
@tisonlyme143
That’s a cute sign!
I love adorable signs!
I love this! Finally, a craft project I can actually do. I love diy, but these days I need my projects to be easy and quick. Your color choices are perfect!
I love this! Think I’m going to try to make one for my laundry room!
My laundry room could totally use a cute sign! Looks so easy!
Thank you Alex!
I have never made a sign before and although this looks so cute I don’t think I have the patience for it.
I love it.
Thanks for the great idea. I love making crafts and decor for around the home and as gifts.
You are more than welcome! Homemade gifts are always the best 🙂
Love this idea!! Such an easy DIY! 🙂
This is so cute and sounds pretty easy. Would look perfect in my laundry room and boy is it ever true! Thanks for the tutorial.
It’s not as hard as you think – I definitely recommend giving it a try!